Bringing your navigator back online (two SD slots)
This guide walks you through changing your navigator’s APN settings and server URL for the ZE0 and AZE0 (2011–2015). Follow each step carefully to ensure a successful setup.
Step 1: Download LeafSDTools and install it on an SD card
Section titled “Step 1: Download LeafSDTools and install it on an SD card”You need the LeafSDTools toolkit to export the navigator’s settings.
-
Get an SD card with a capacity of 8 GB or more. A microSD card with an adapter also works.
-
Download the latest LeafSDTools
.imgfile from GitHub (LeafSDTools-xxx.img.tar.gz). -
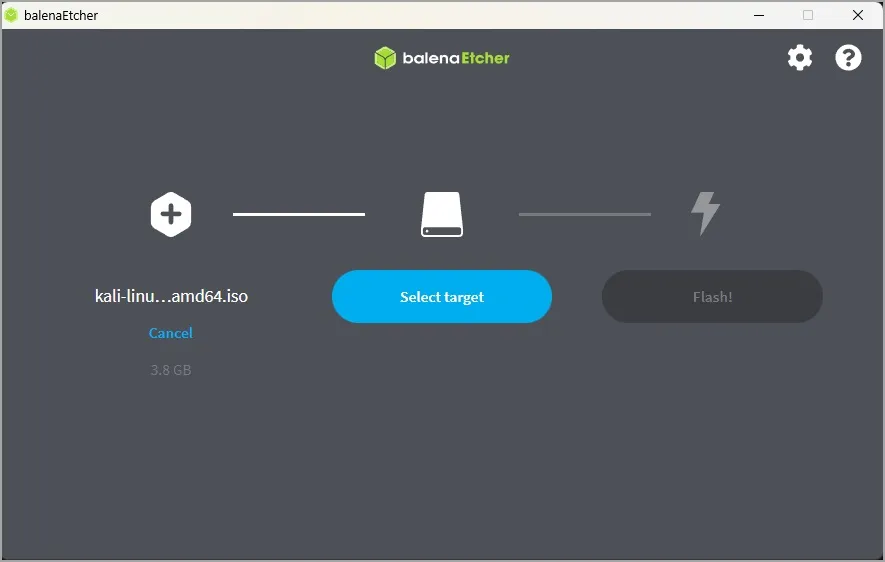
Download balenaEtcher or a similar tool to write the image to the SD card.
-
Write the disk image to the SD card.
Step 2: Run LeafSDTools and export the settings to the SD card
Section titled “Step 2: Run LeafSDTools and export the settings to the SD card”Now that LeafSDTools is on your SD card, extract the settings file from the navigation unit.
Enter the software update menu
Section titled “Enter the software update menu”-
Start your car. With the navigator fully booted, enter the map view by pressing MAP.
-
Press the power button on the bottom left to turn off the audio.
-
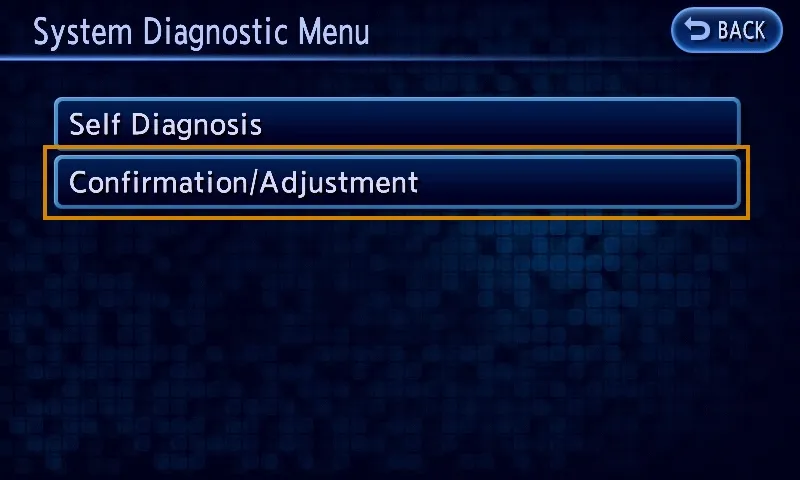
Press MAP three times, press the media on/off button twice, and finally press MAP once more. If it worked, you will see this screen:
-
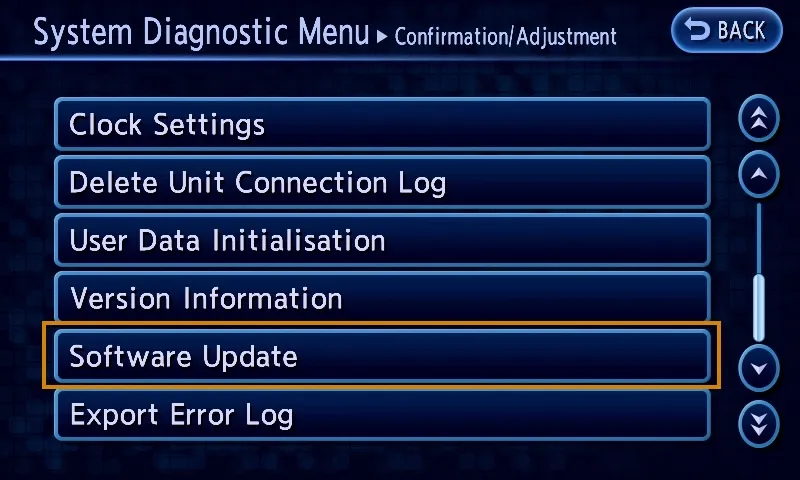
Open the Confirmation/Adjustment menu and scroll to Software Update.
-
Start the update process. The head unit should reboot.
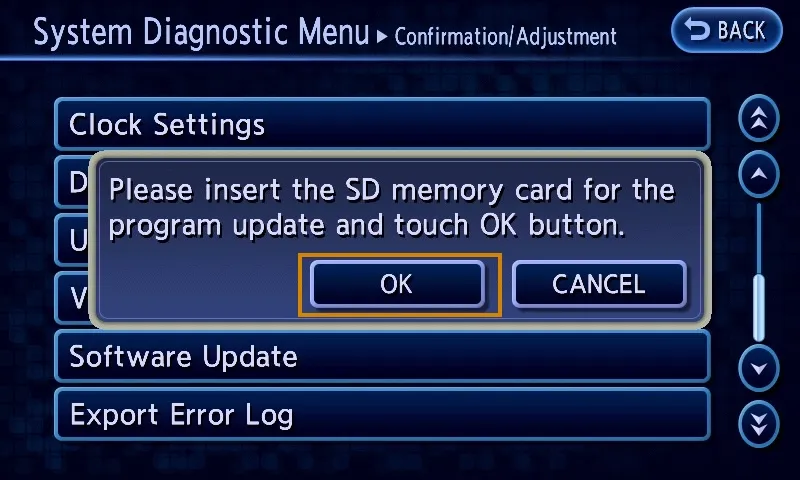
-
When a YES/NO dialog appears, turn off the car, remove the SD card from MAP slot (B) and insert your own SD card with LeafSDTools.
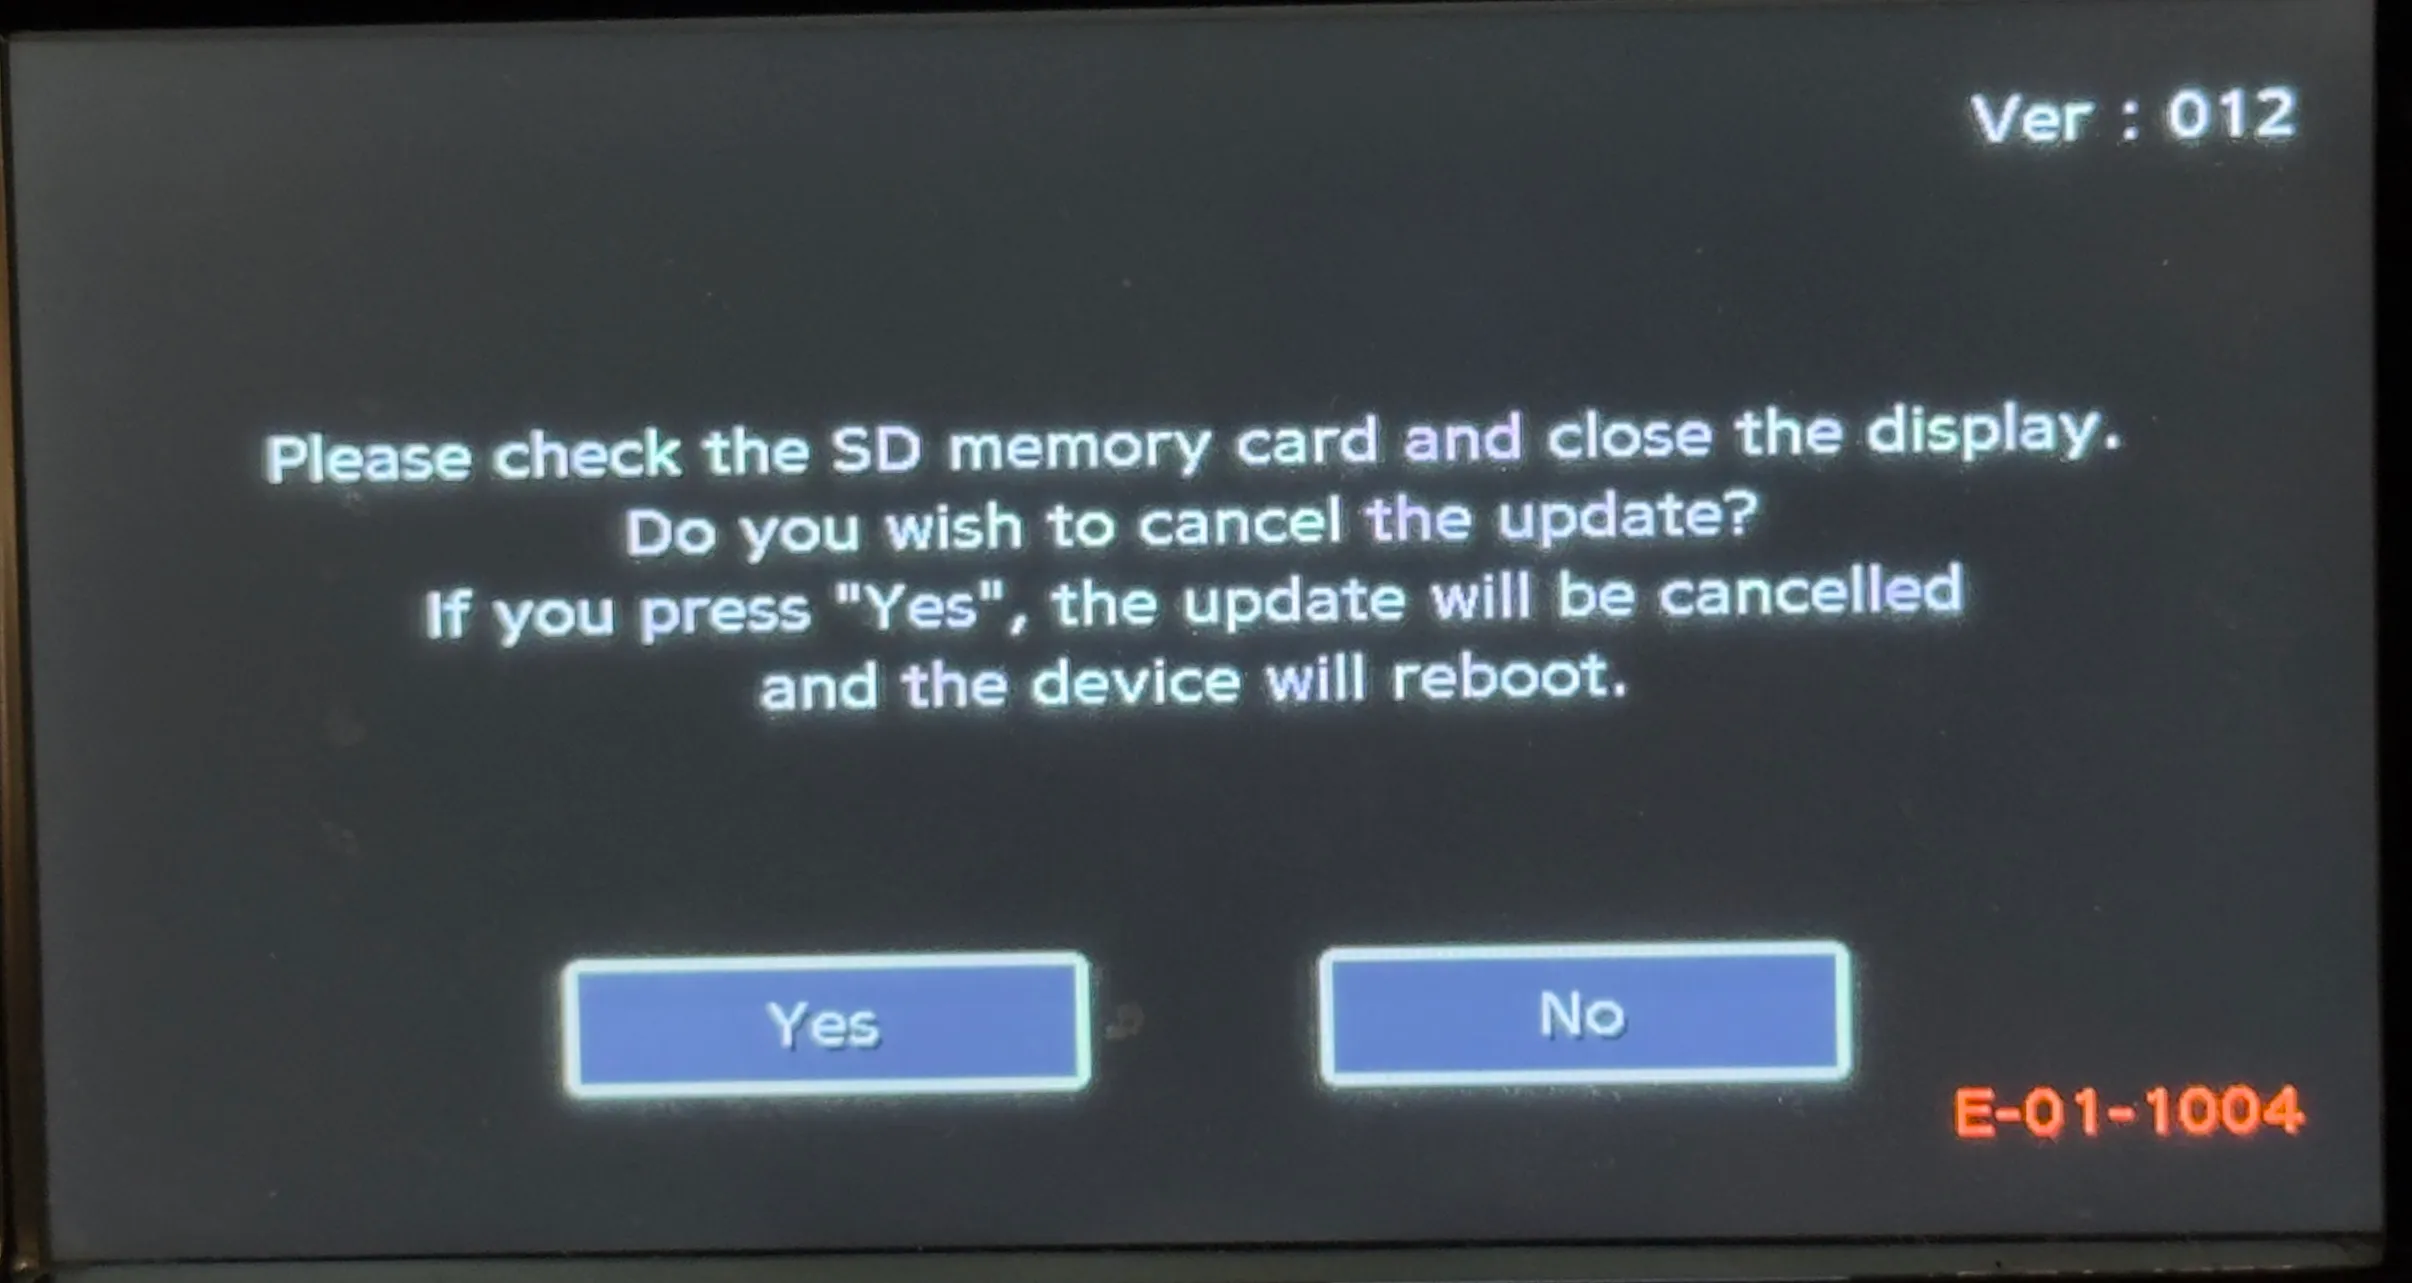
Dump the settings to the SD card
Section titled “Dump the settings to the SD card”-
With the LeafSDTools SD card in MAP slot B, turn on the car. After a few seconds LeafSDTools starts. Press the SRAM menu.
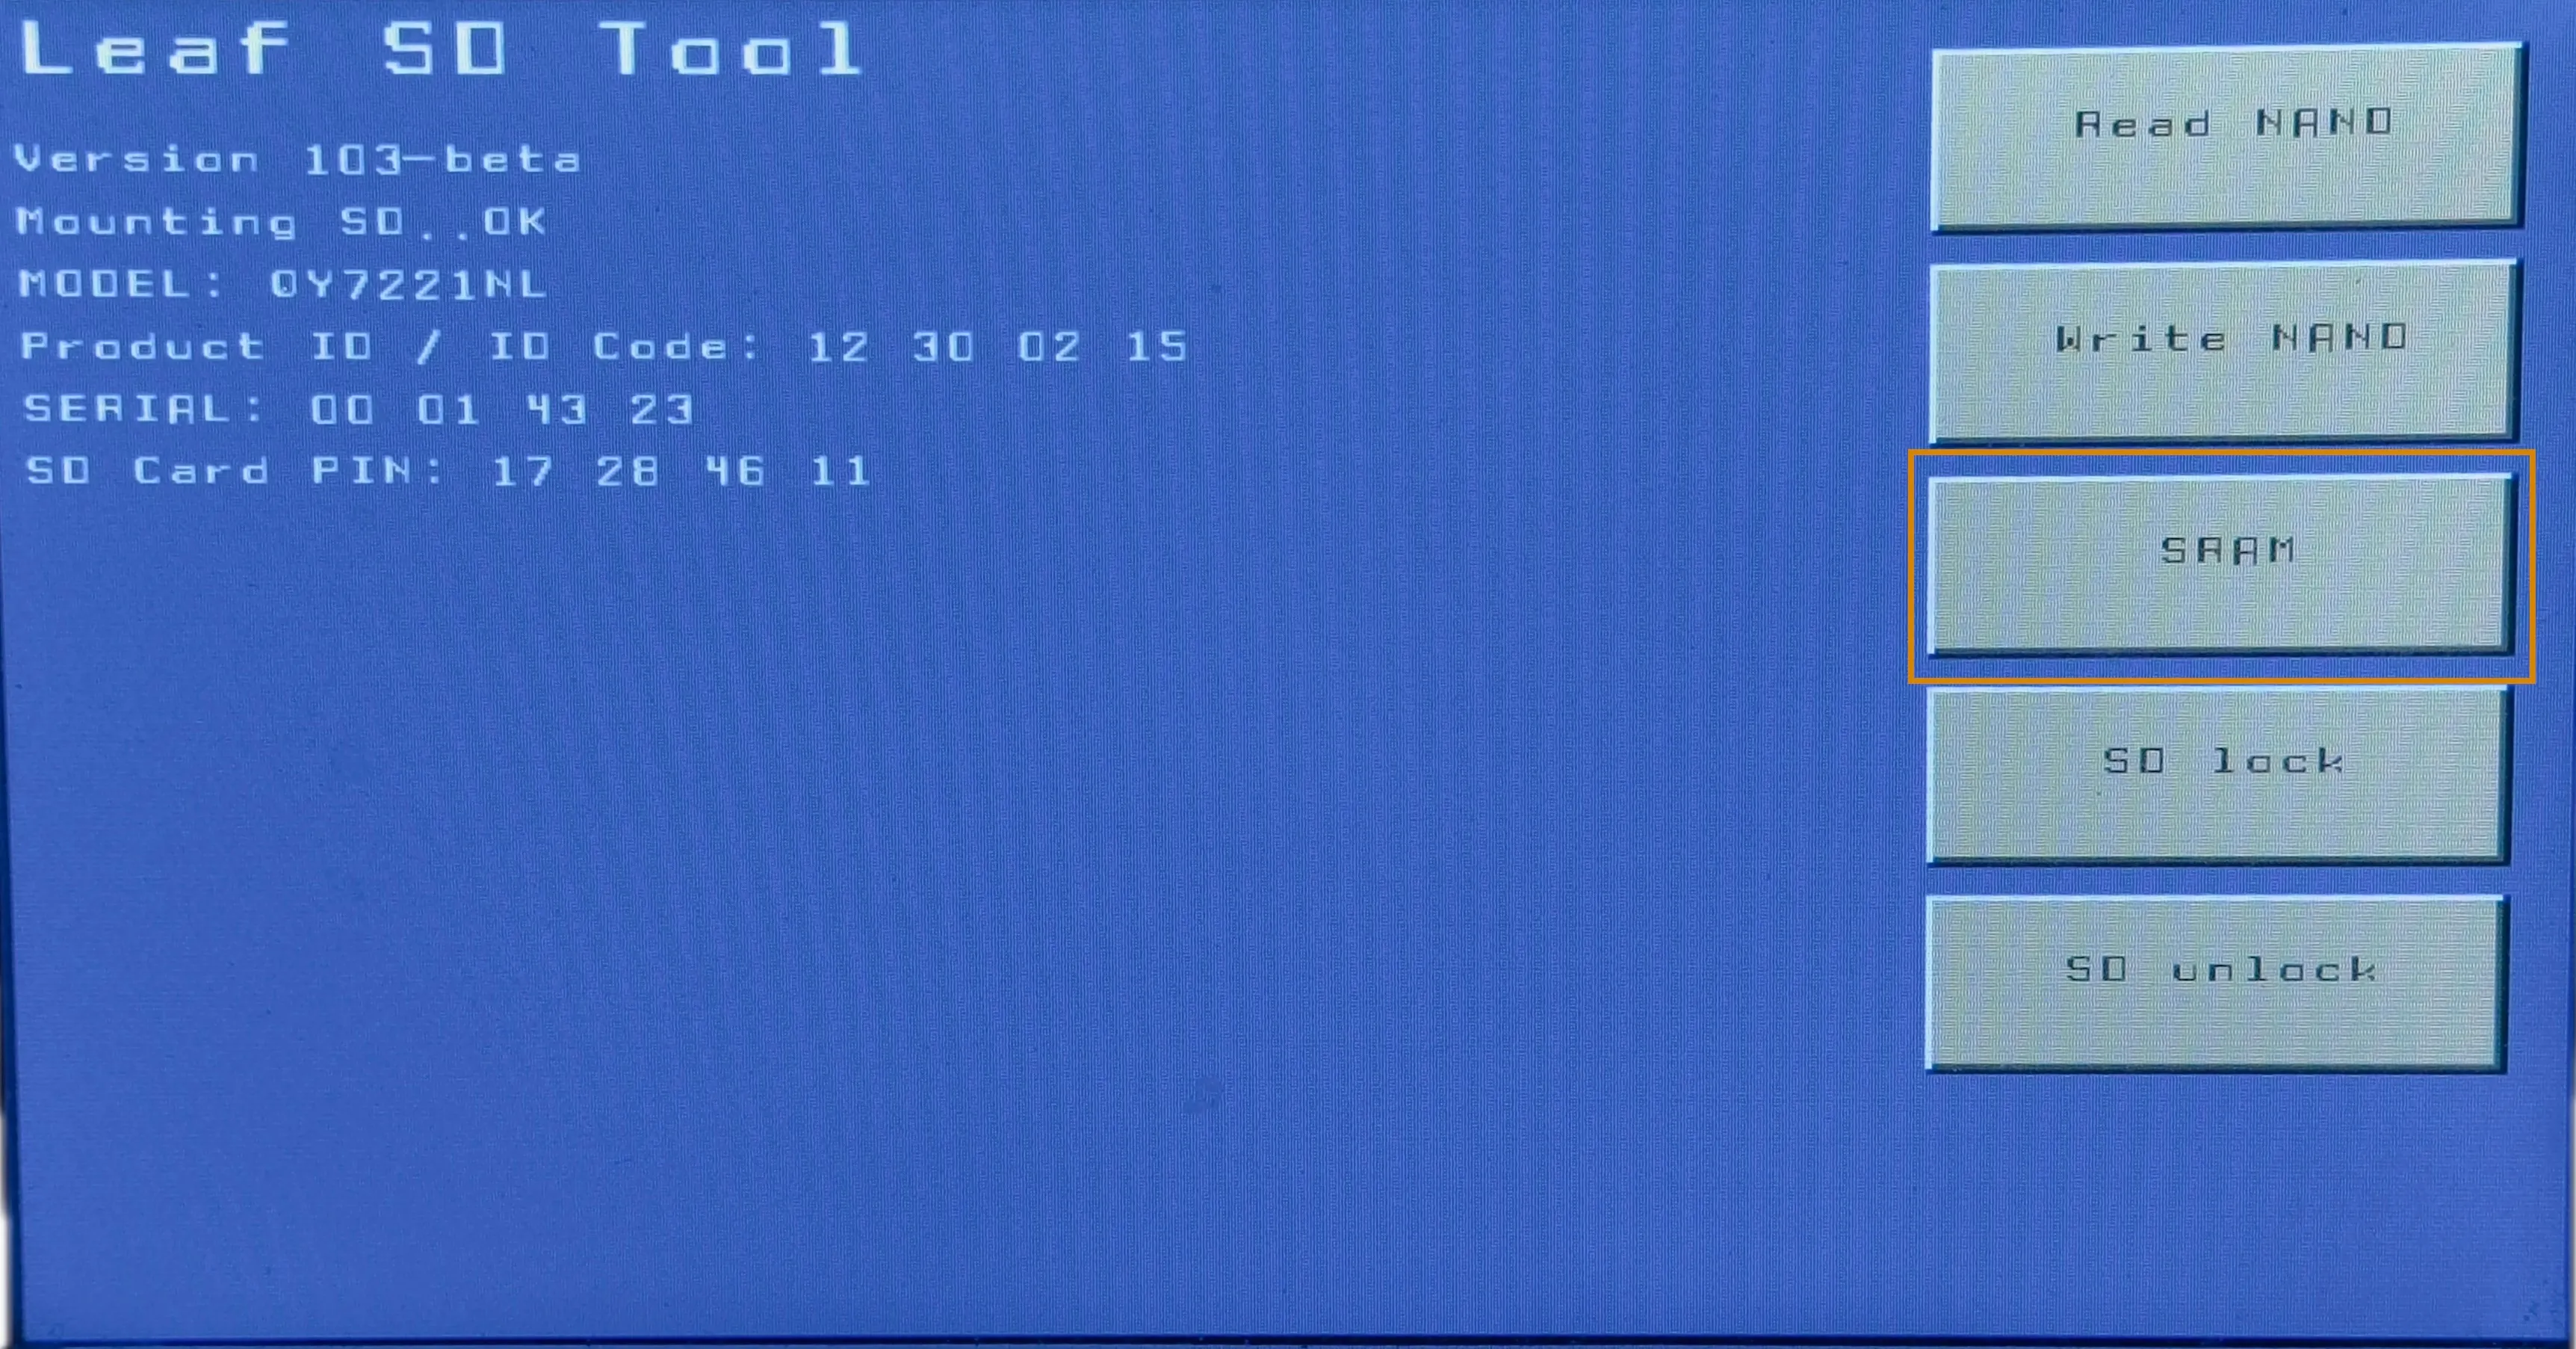
-
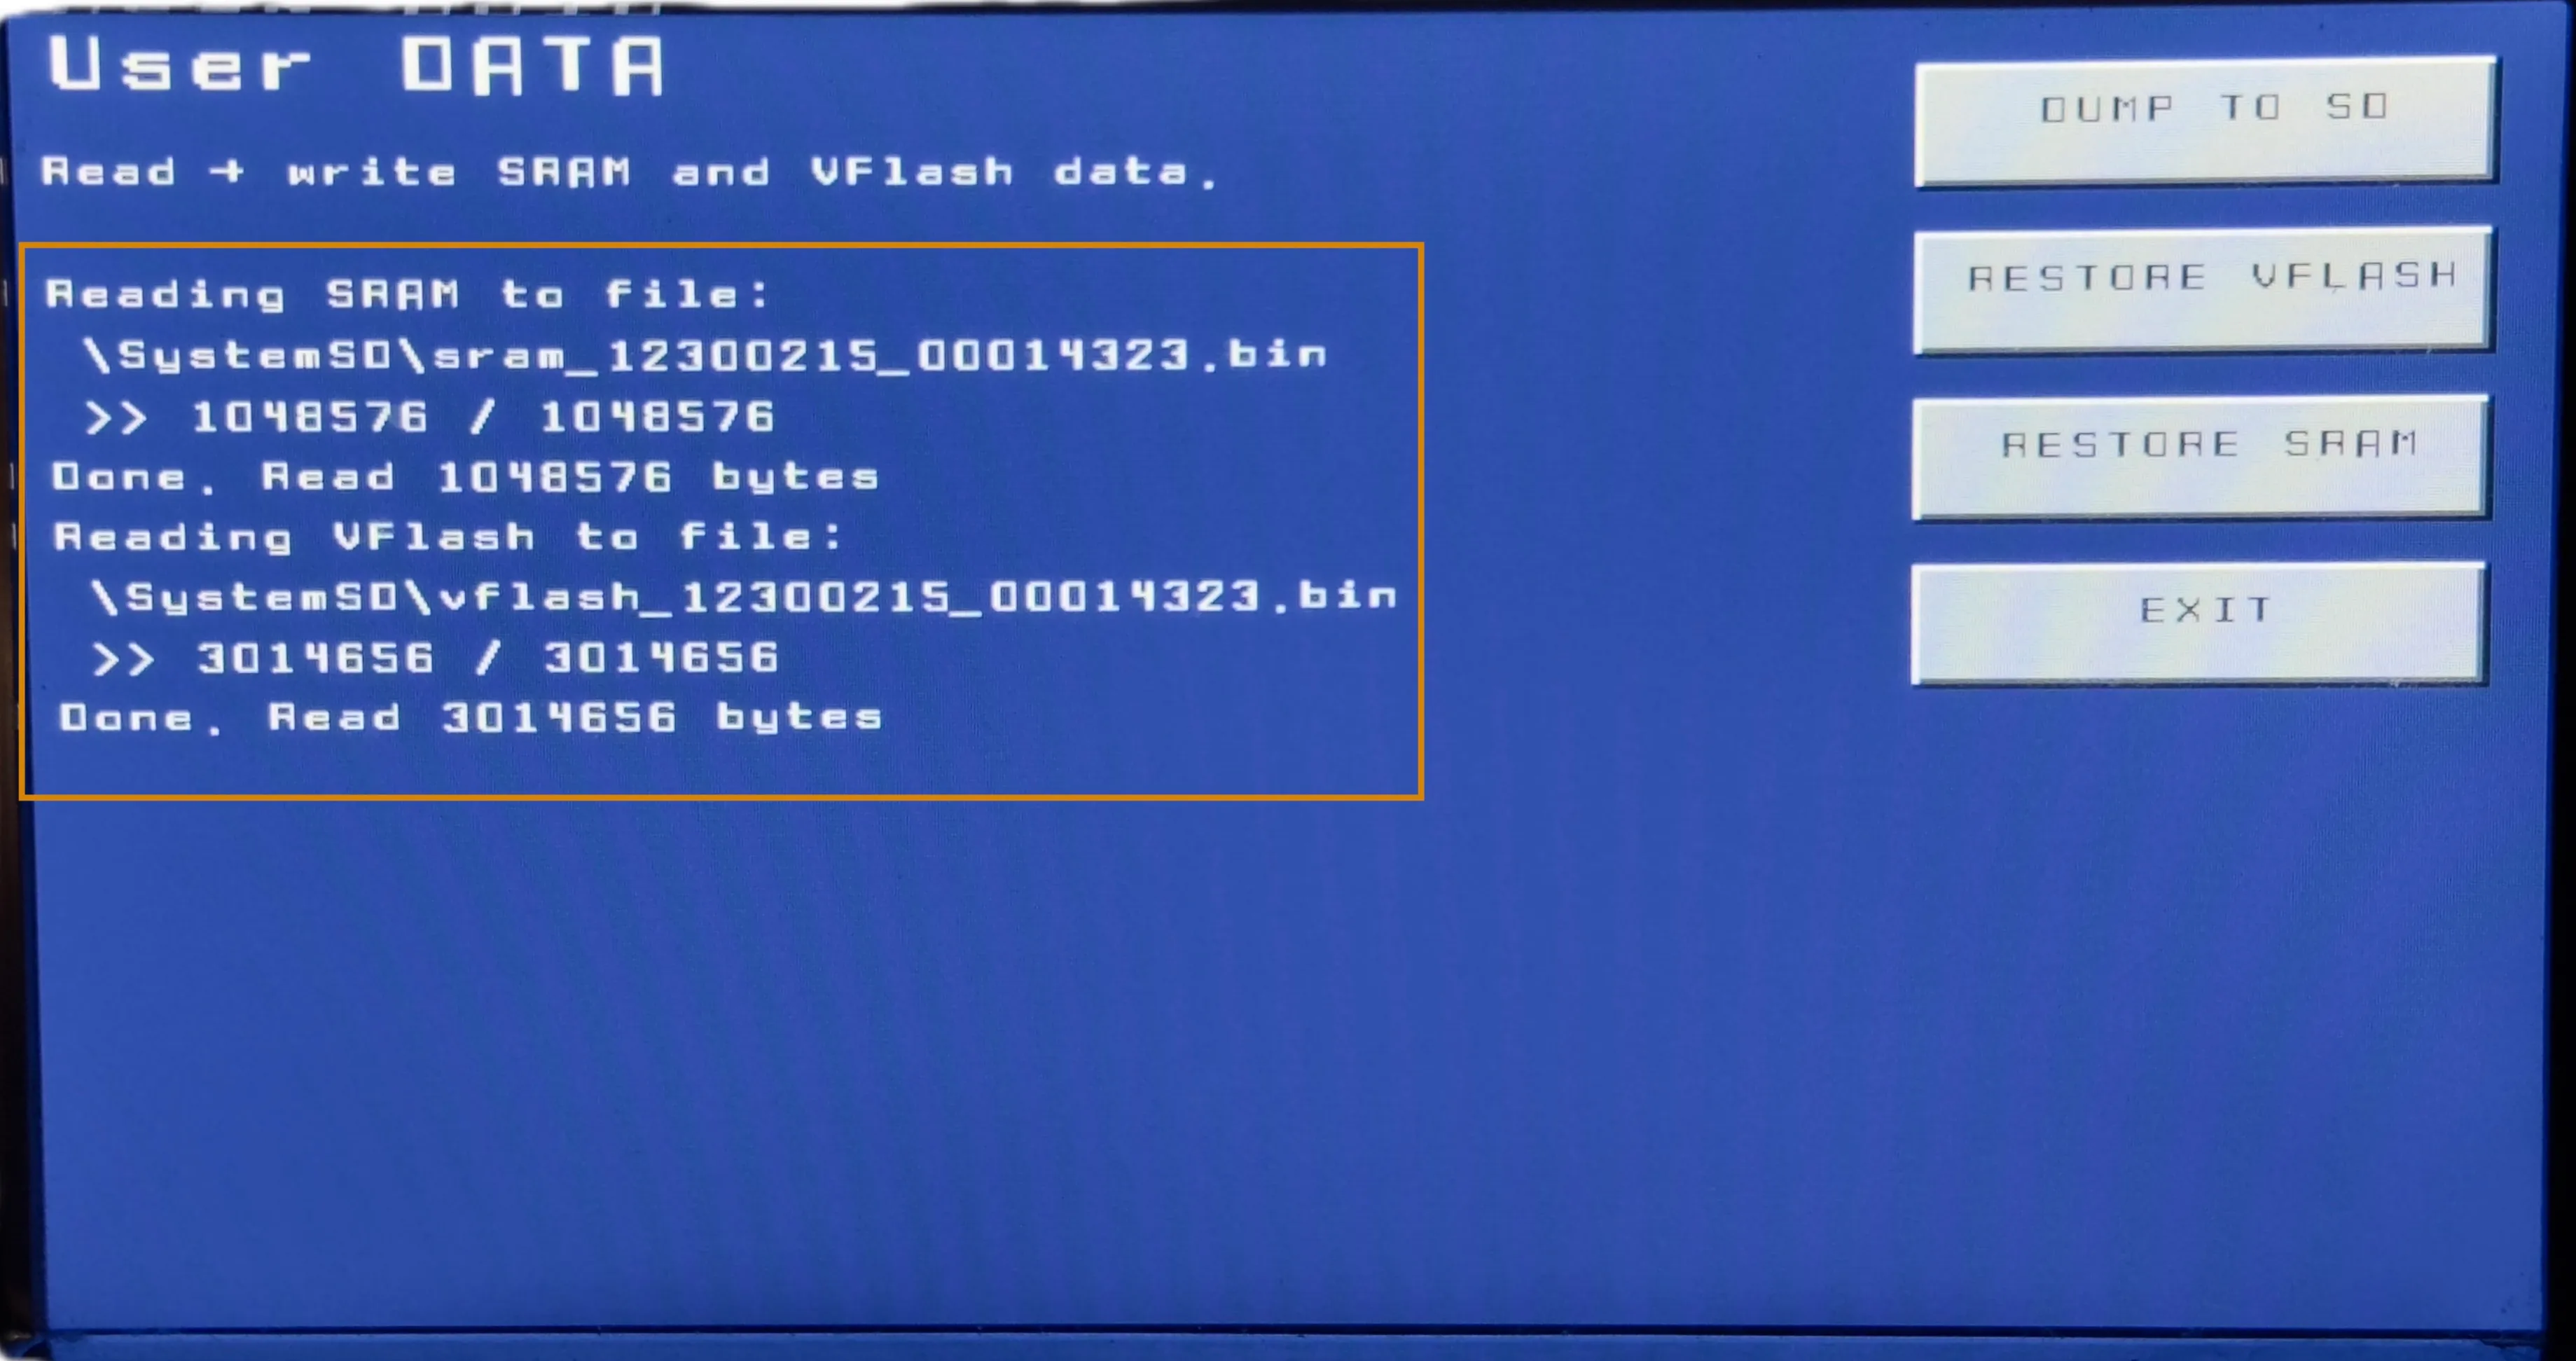
Press Dump to SD and wait until it finishes.
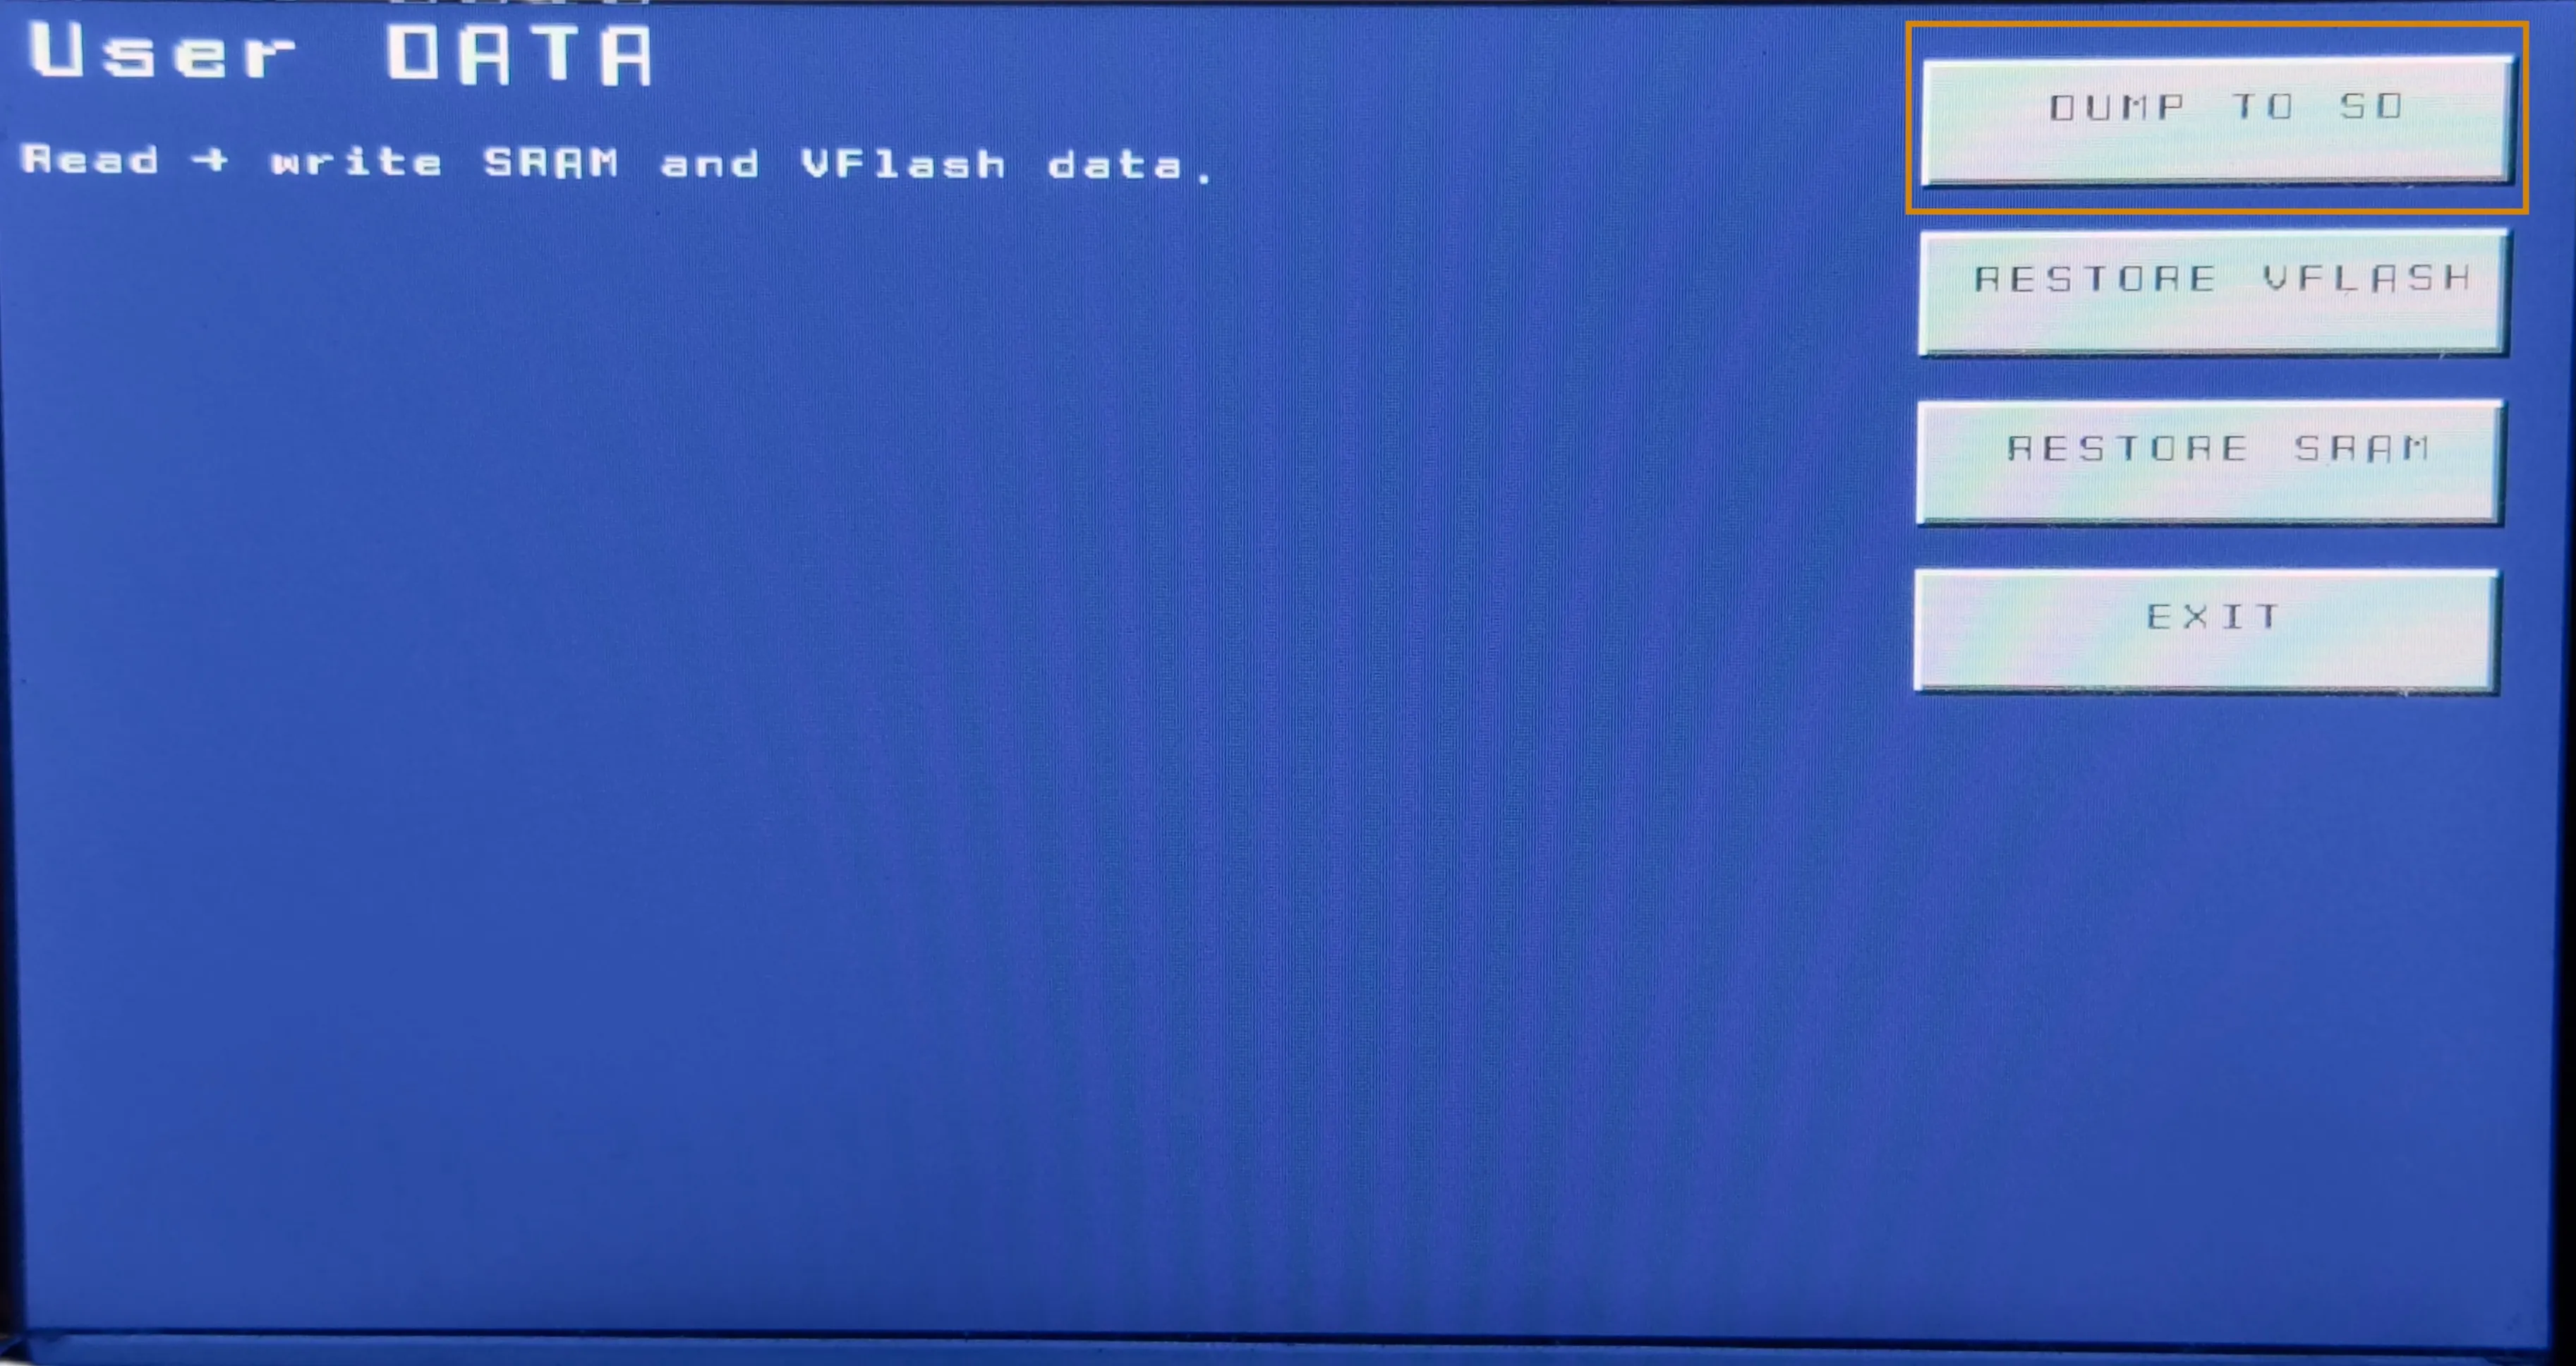
-
After a successful dump, exit the menu, turn off the car and remove the SD card from the navigation unit. Now you can edit the file on your computer.
Step 3: Edit the navigation unit settings
Section titled “Step 3: Edit the navigation unit settings”With the SD card plugged into your computer, you should see a file named like this:

If the file is there, edit the APN settings inside it:
-
Copy
vflash_xxxxxxxx_xxxxxxxx.binfrom the SD card somewhere else, for example your Desktop or Documents folder. -
Open https://opencarwings.viaaq.eu/navi in your browser.
-
Select the
vflash_xxxxxxxx_xxxxxxxx.binfile from your computer. The fields should fill in and Connection Profile 1 should appear. If not, please contact the developer.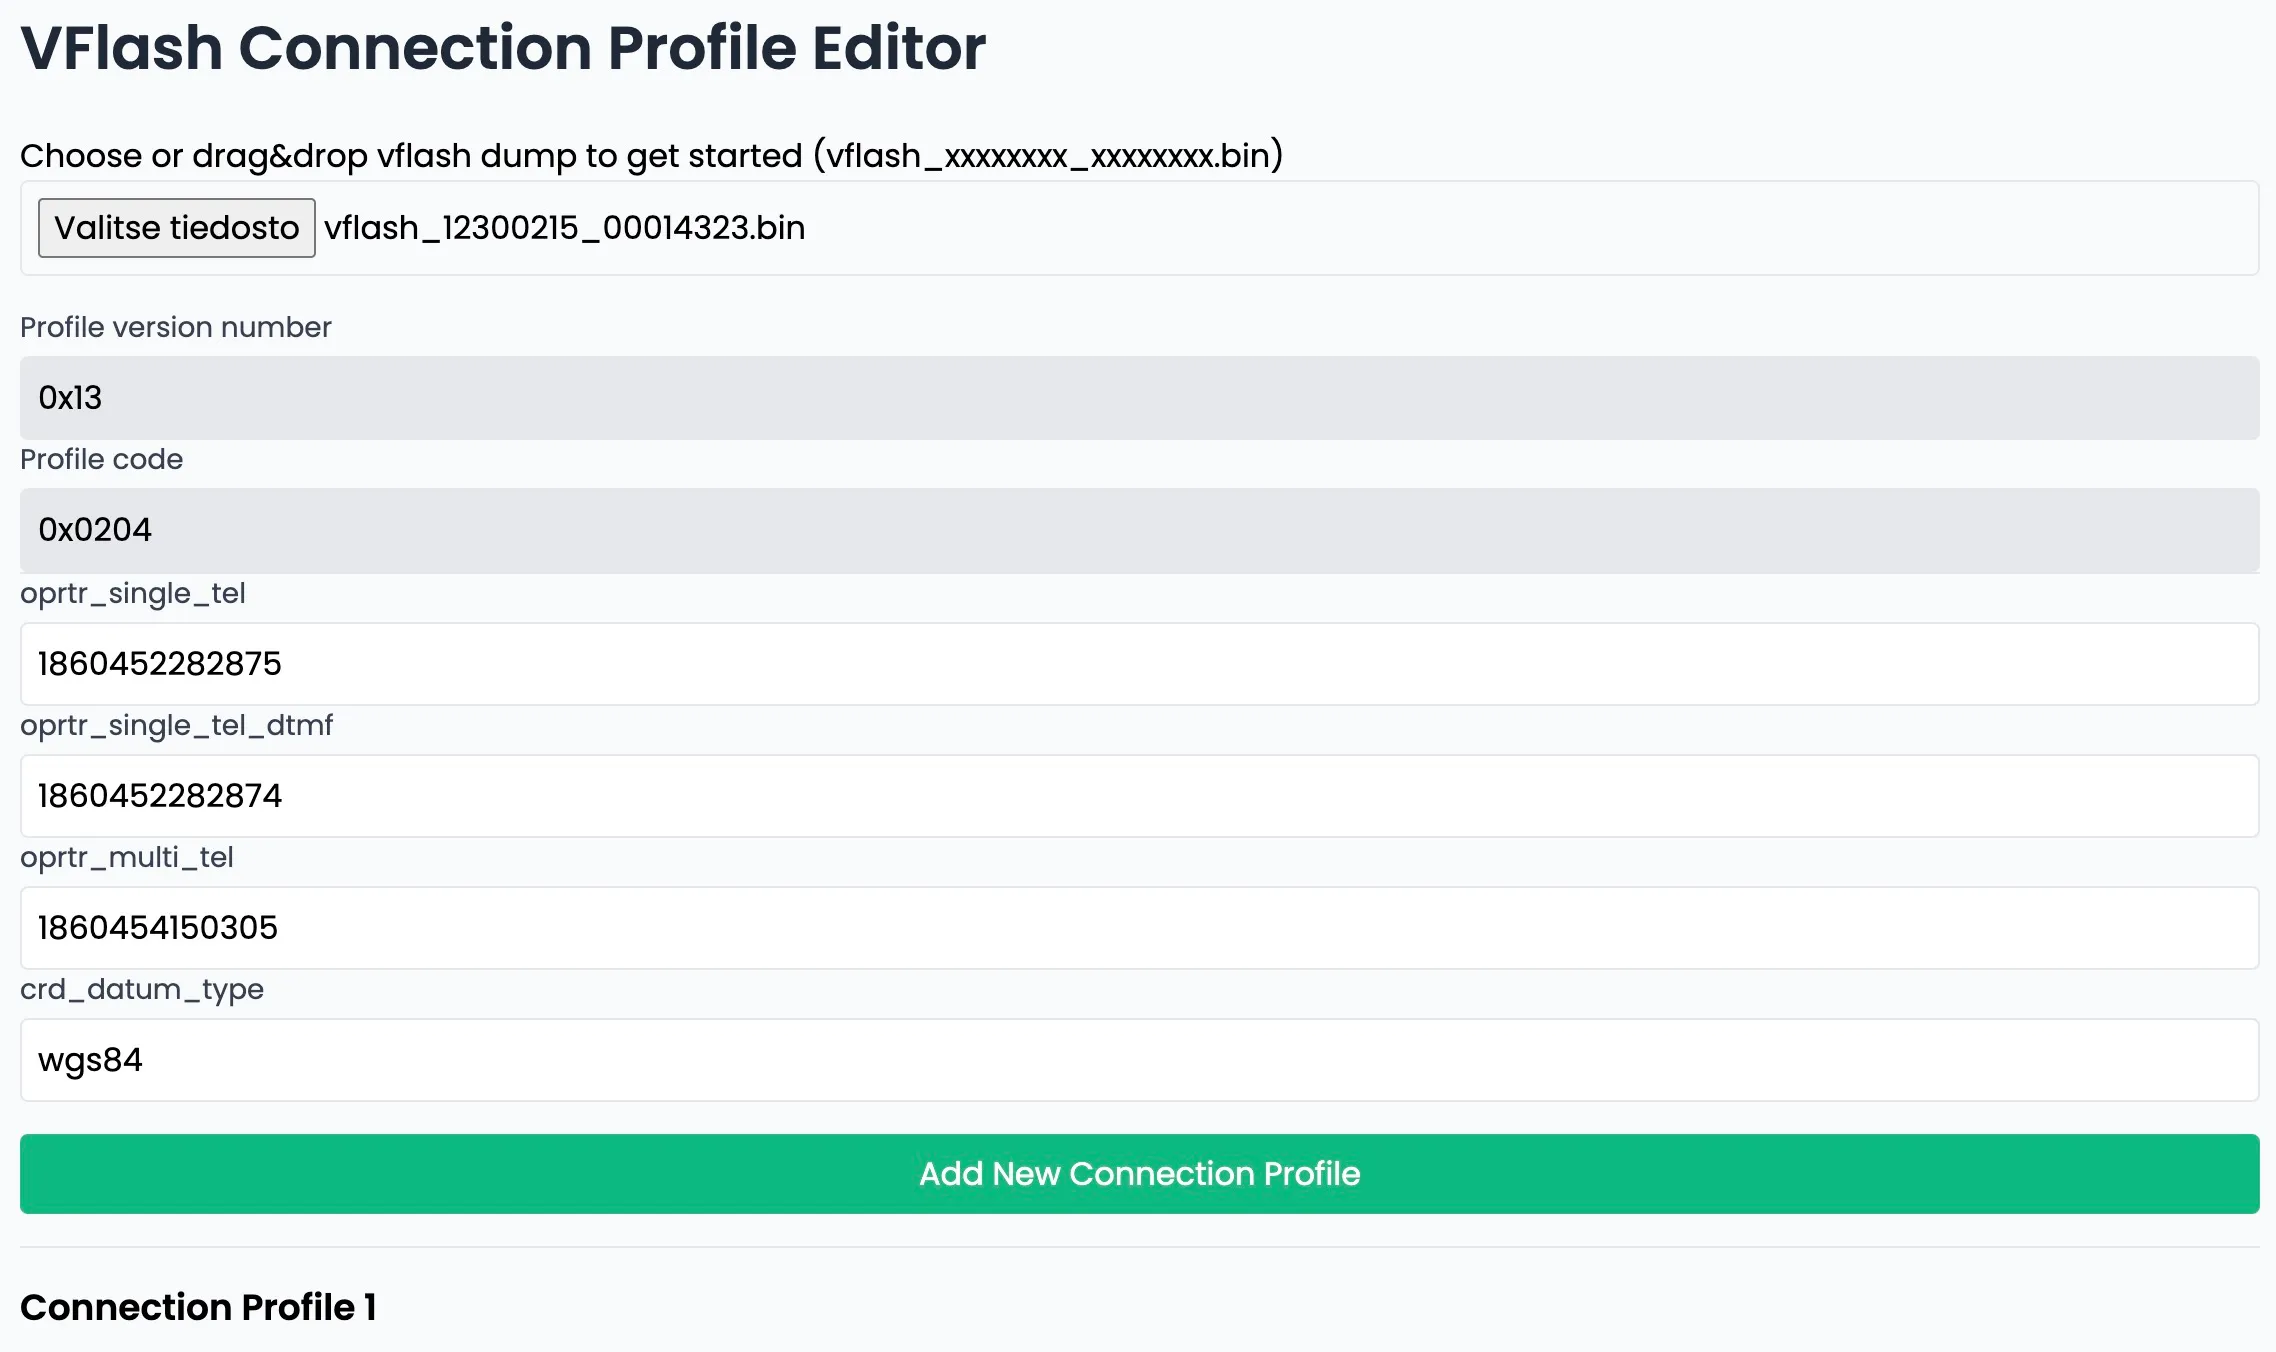
-
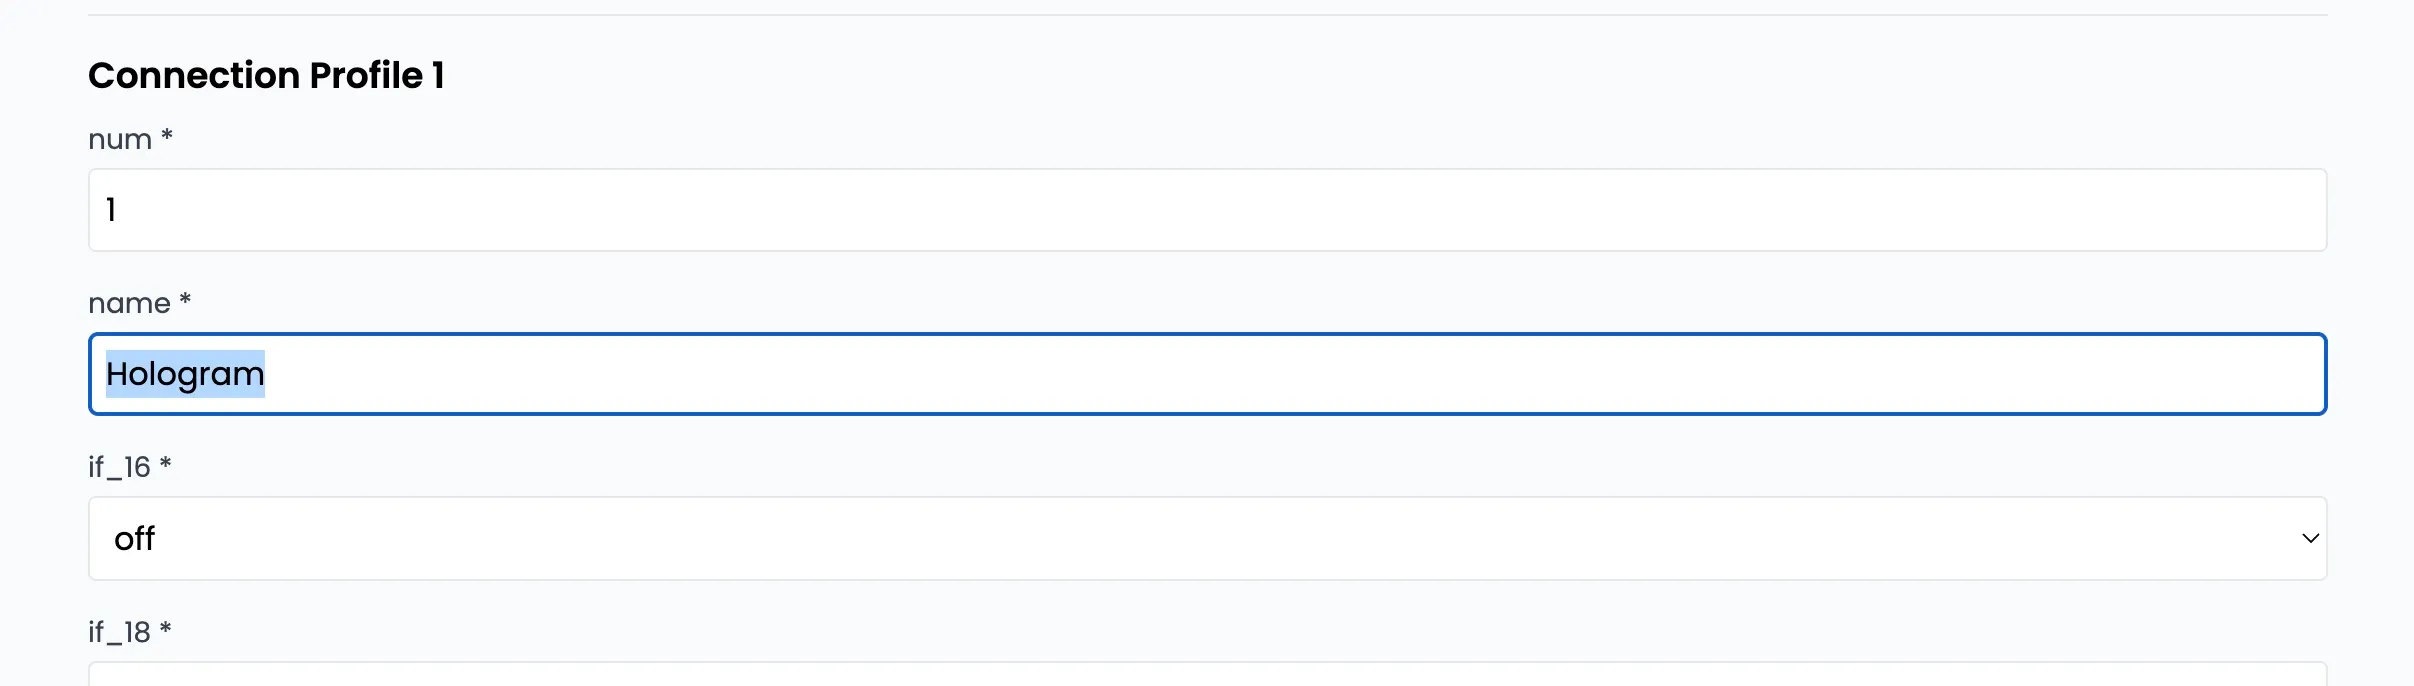
Name your connection profile after your mobile operator.
-
Change the APN name in the
apn [cws]field. Depending on your SIM provider you may also need to change the APN user and password inusr [cws]andpsswrd [cws].


-
Change the server URL in the
url [cws]field.Server URL Original: http://biz.nissan-gev.com/WARCondelivbas/it-m_gw10/New: http://biz.viaaq.eu/WARCondelivbas/it-m_gw10/Original:
![The url [cws] field with the original Nissan URL](/static/docs/_astro/img15.DtkZrErY_sH9Ss.webp)
Modified:
![The url [cws] field with the modified URL](/static/docs/_astro/img16.DmBnRyUA_2opOfC.webp)
-
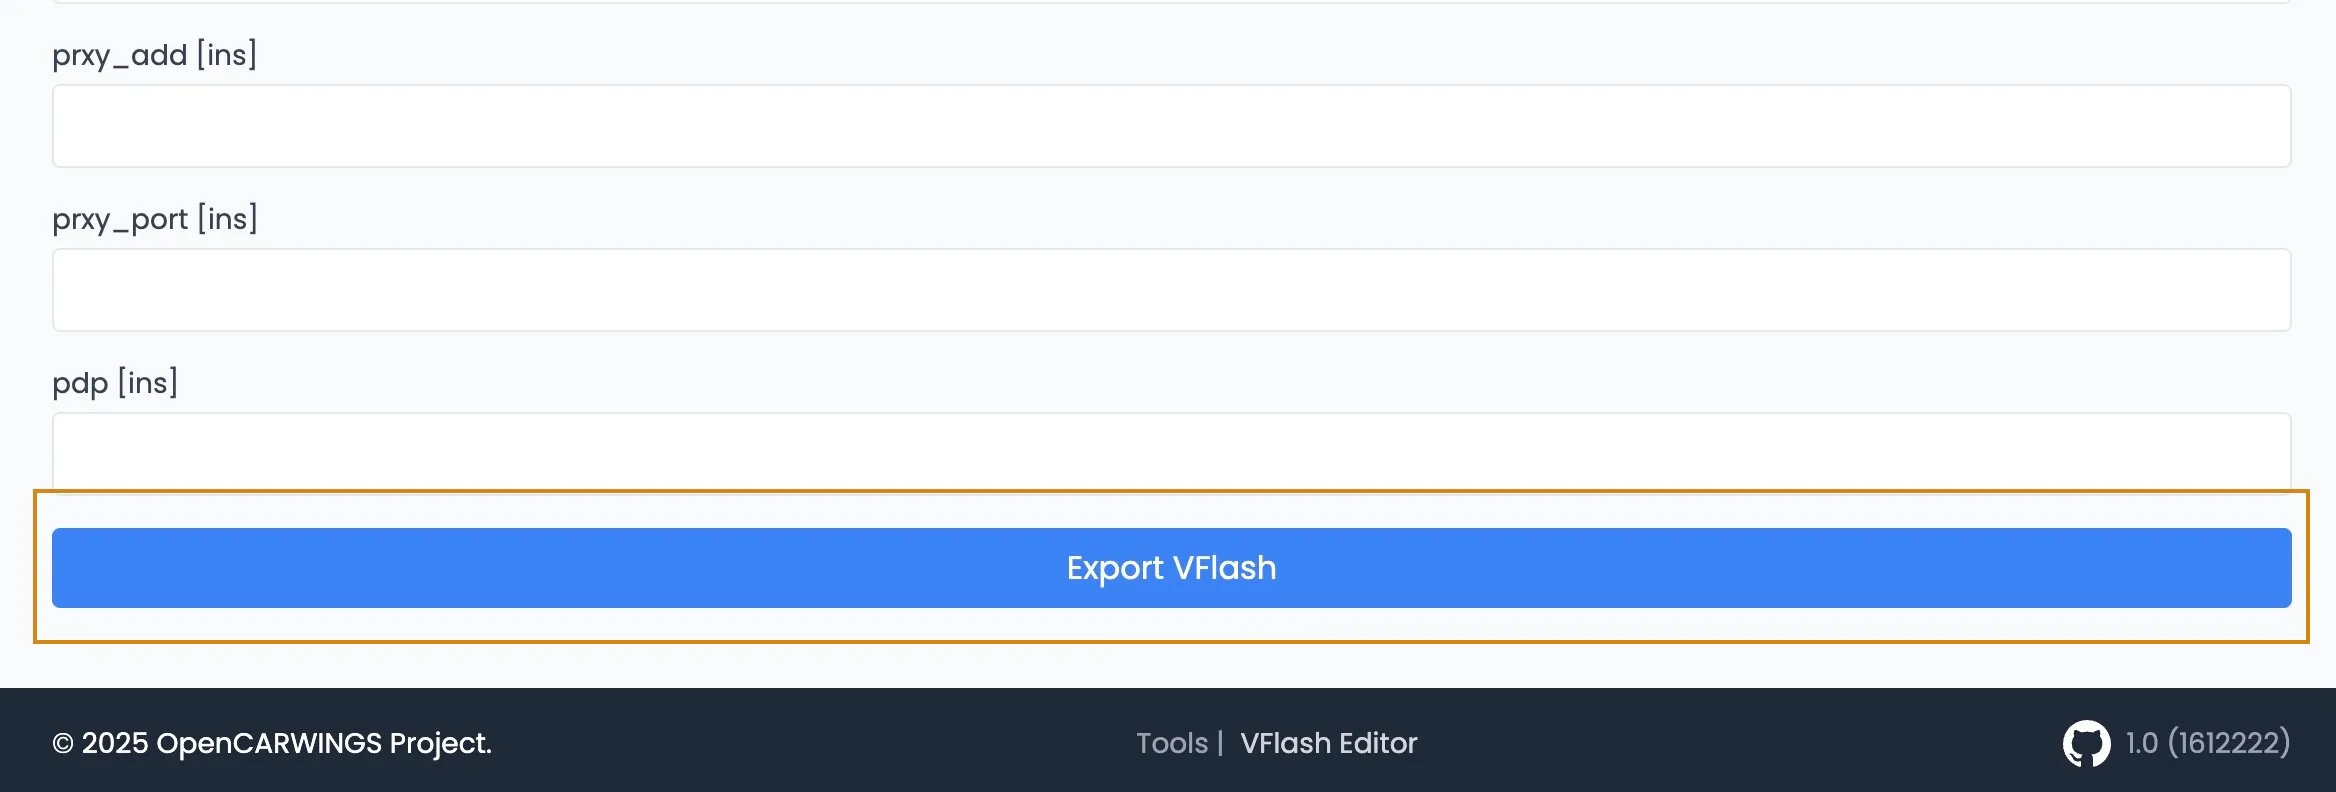
Scroll to the bottom and click Export. A new settings file is downloaded. Copy it onto the SD card, and confirm if asked to overwrite the existing file.
Step 4: Write the new settings to the navigation unit
Section titled “Step 4: Write the new settings to the navigation unit”With the modified settings file on the SD card, go back to the car, insert the card into slot B and start the car.
-
When LeafSDTools boots, select the SRAM option.
-
Press RESTORE VFlash and wait until it finishes.
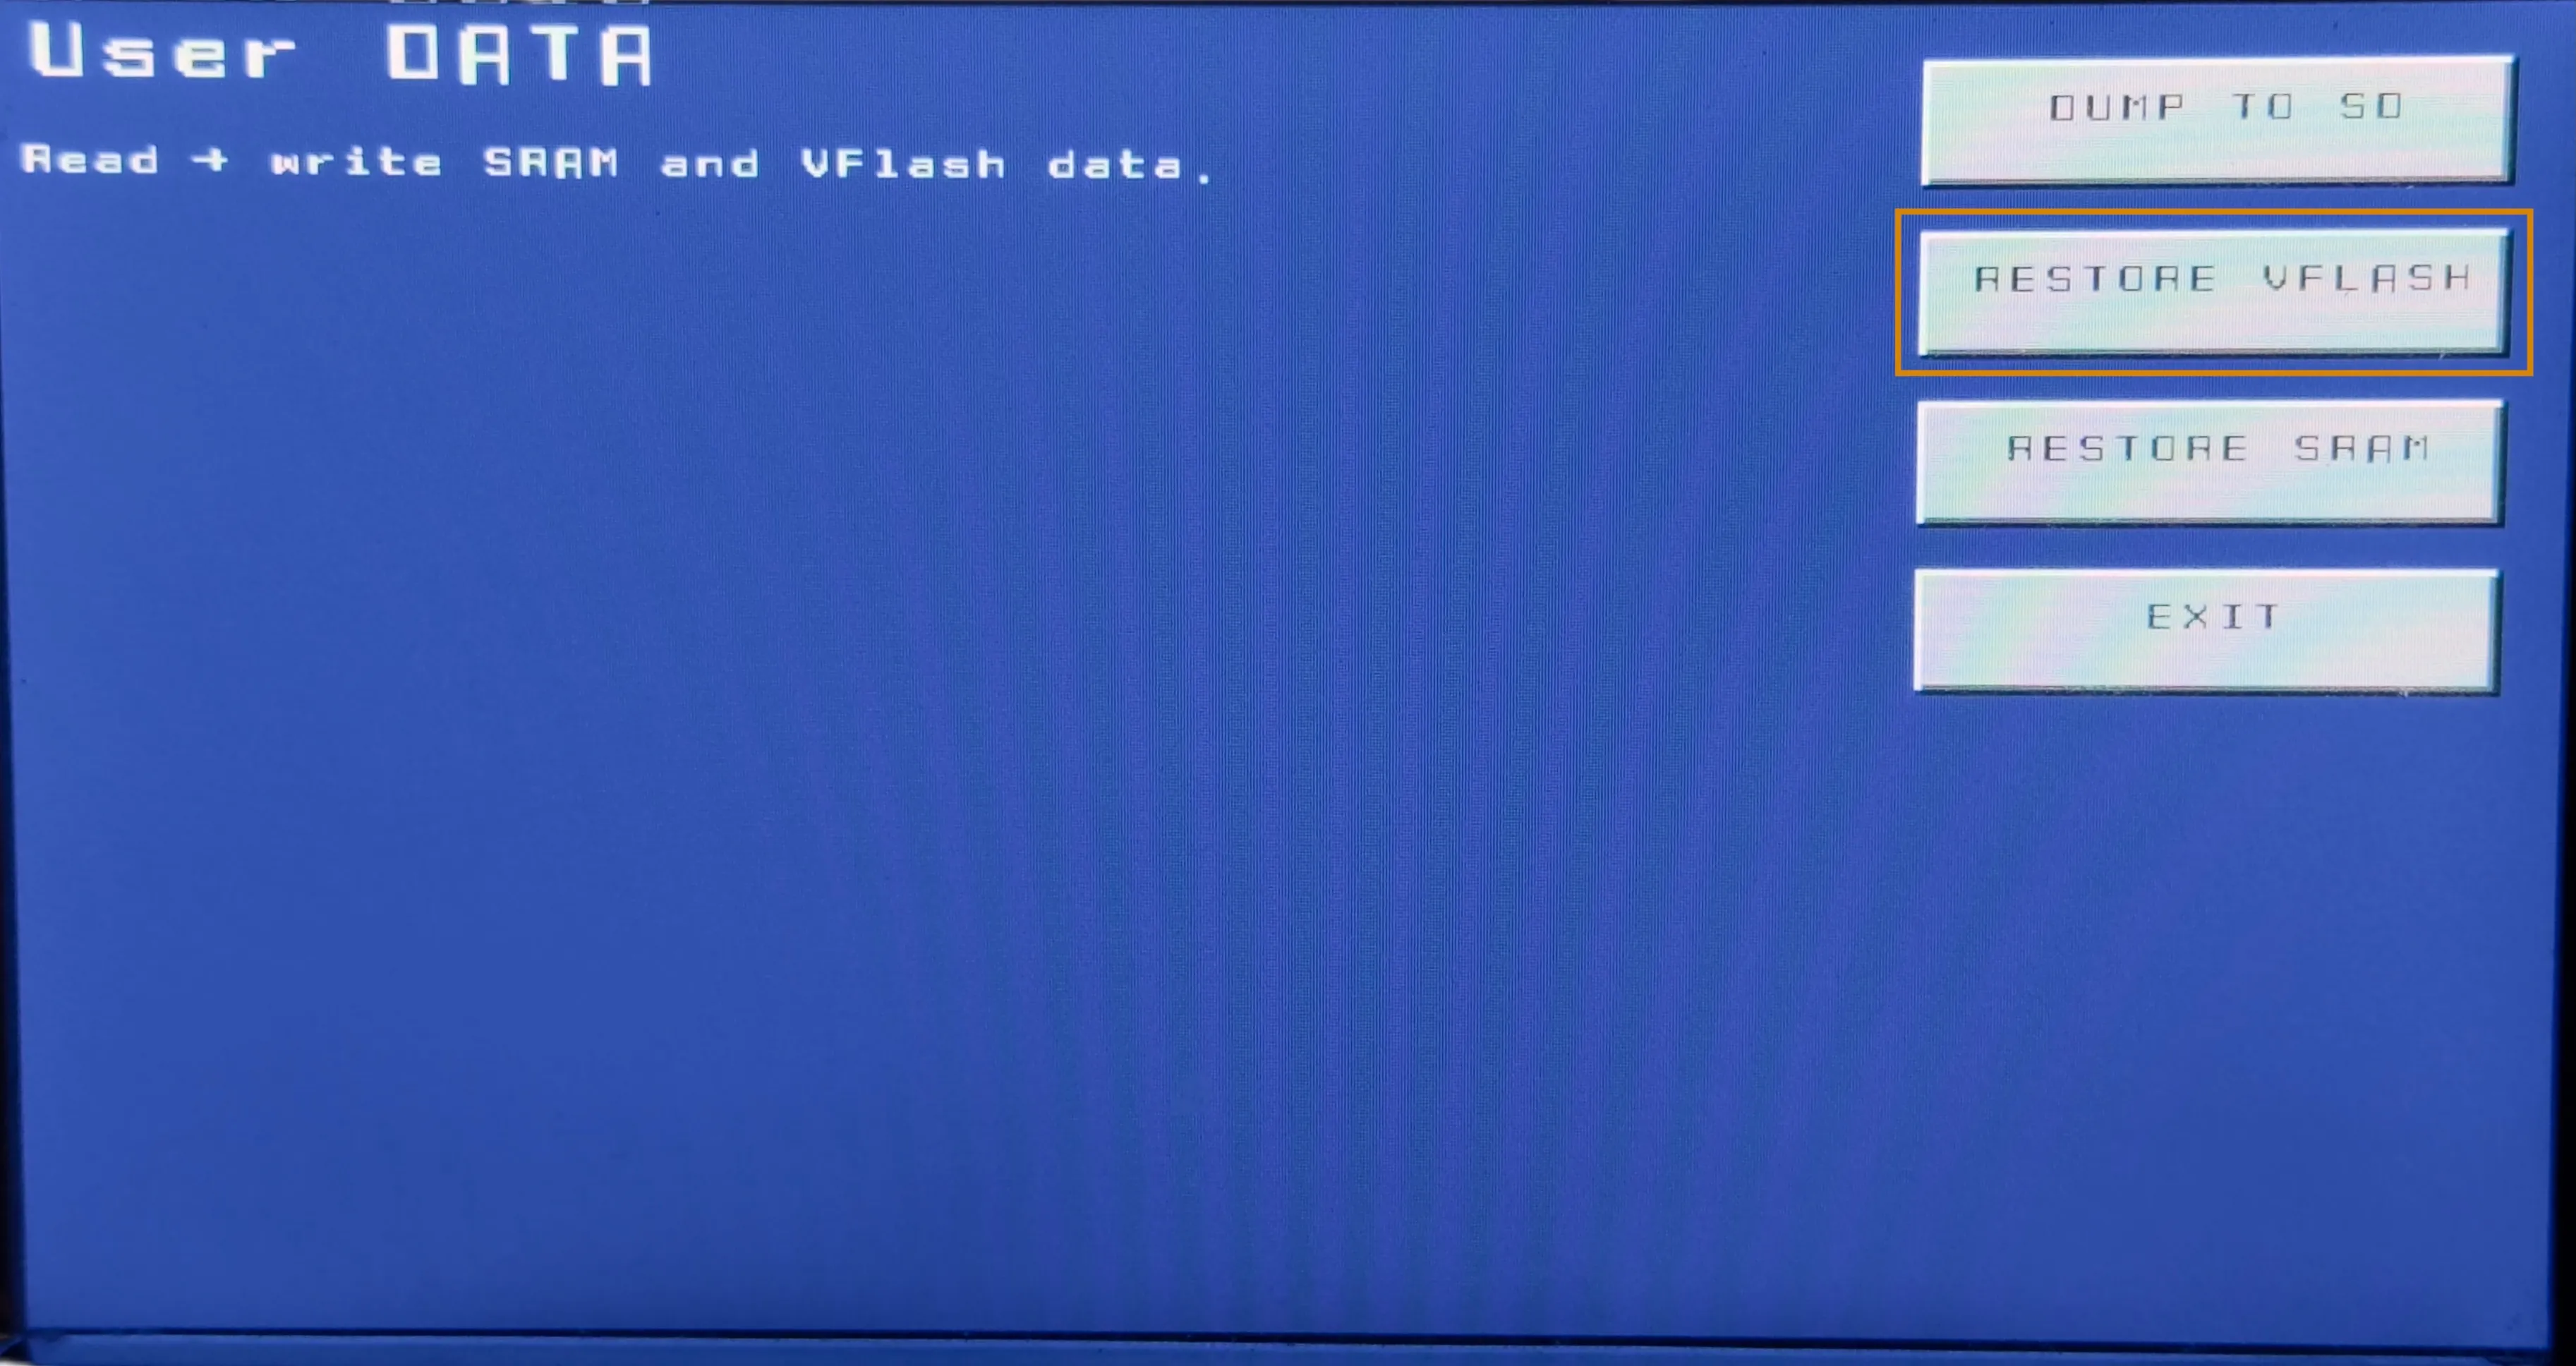
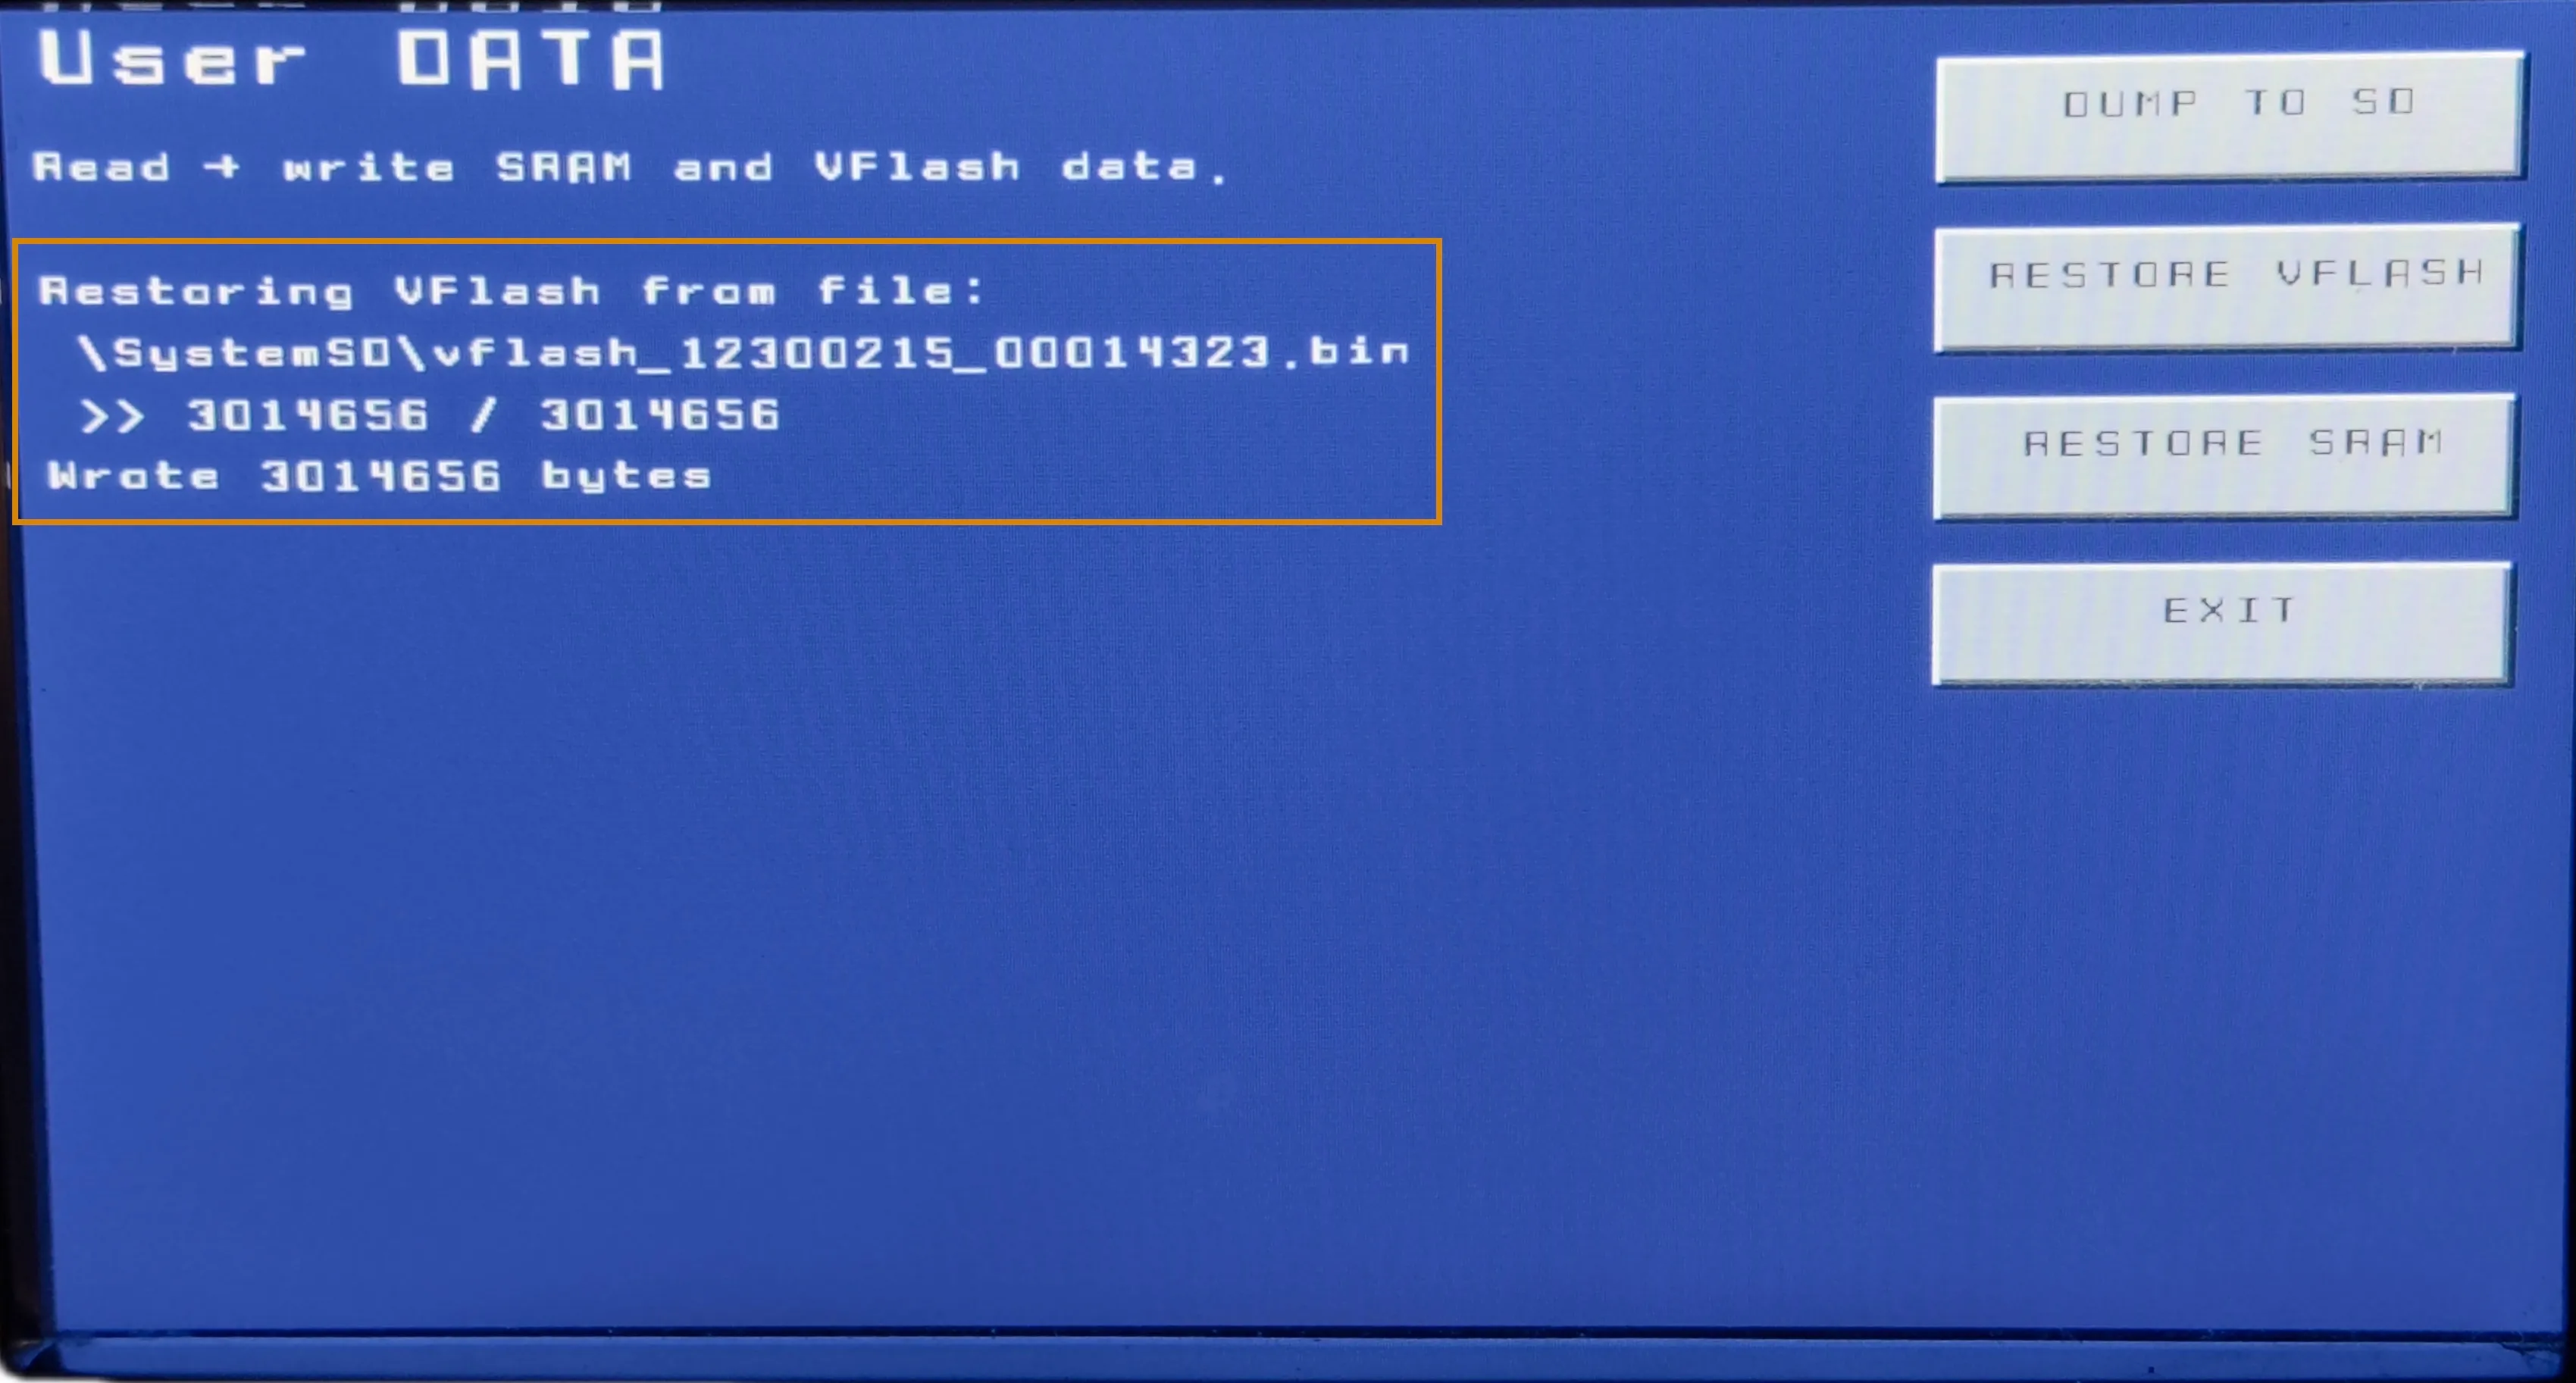
-
When the restore is complete, press EXIT to return to the main menu, then turn off the car.
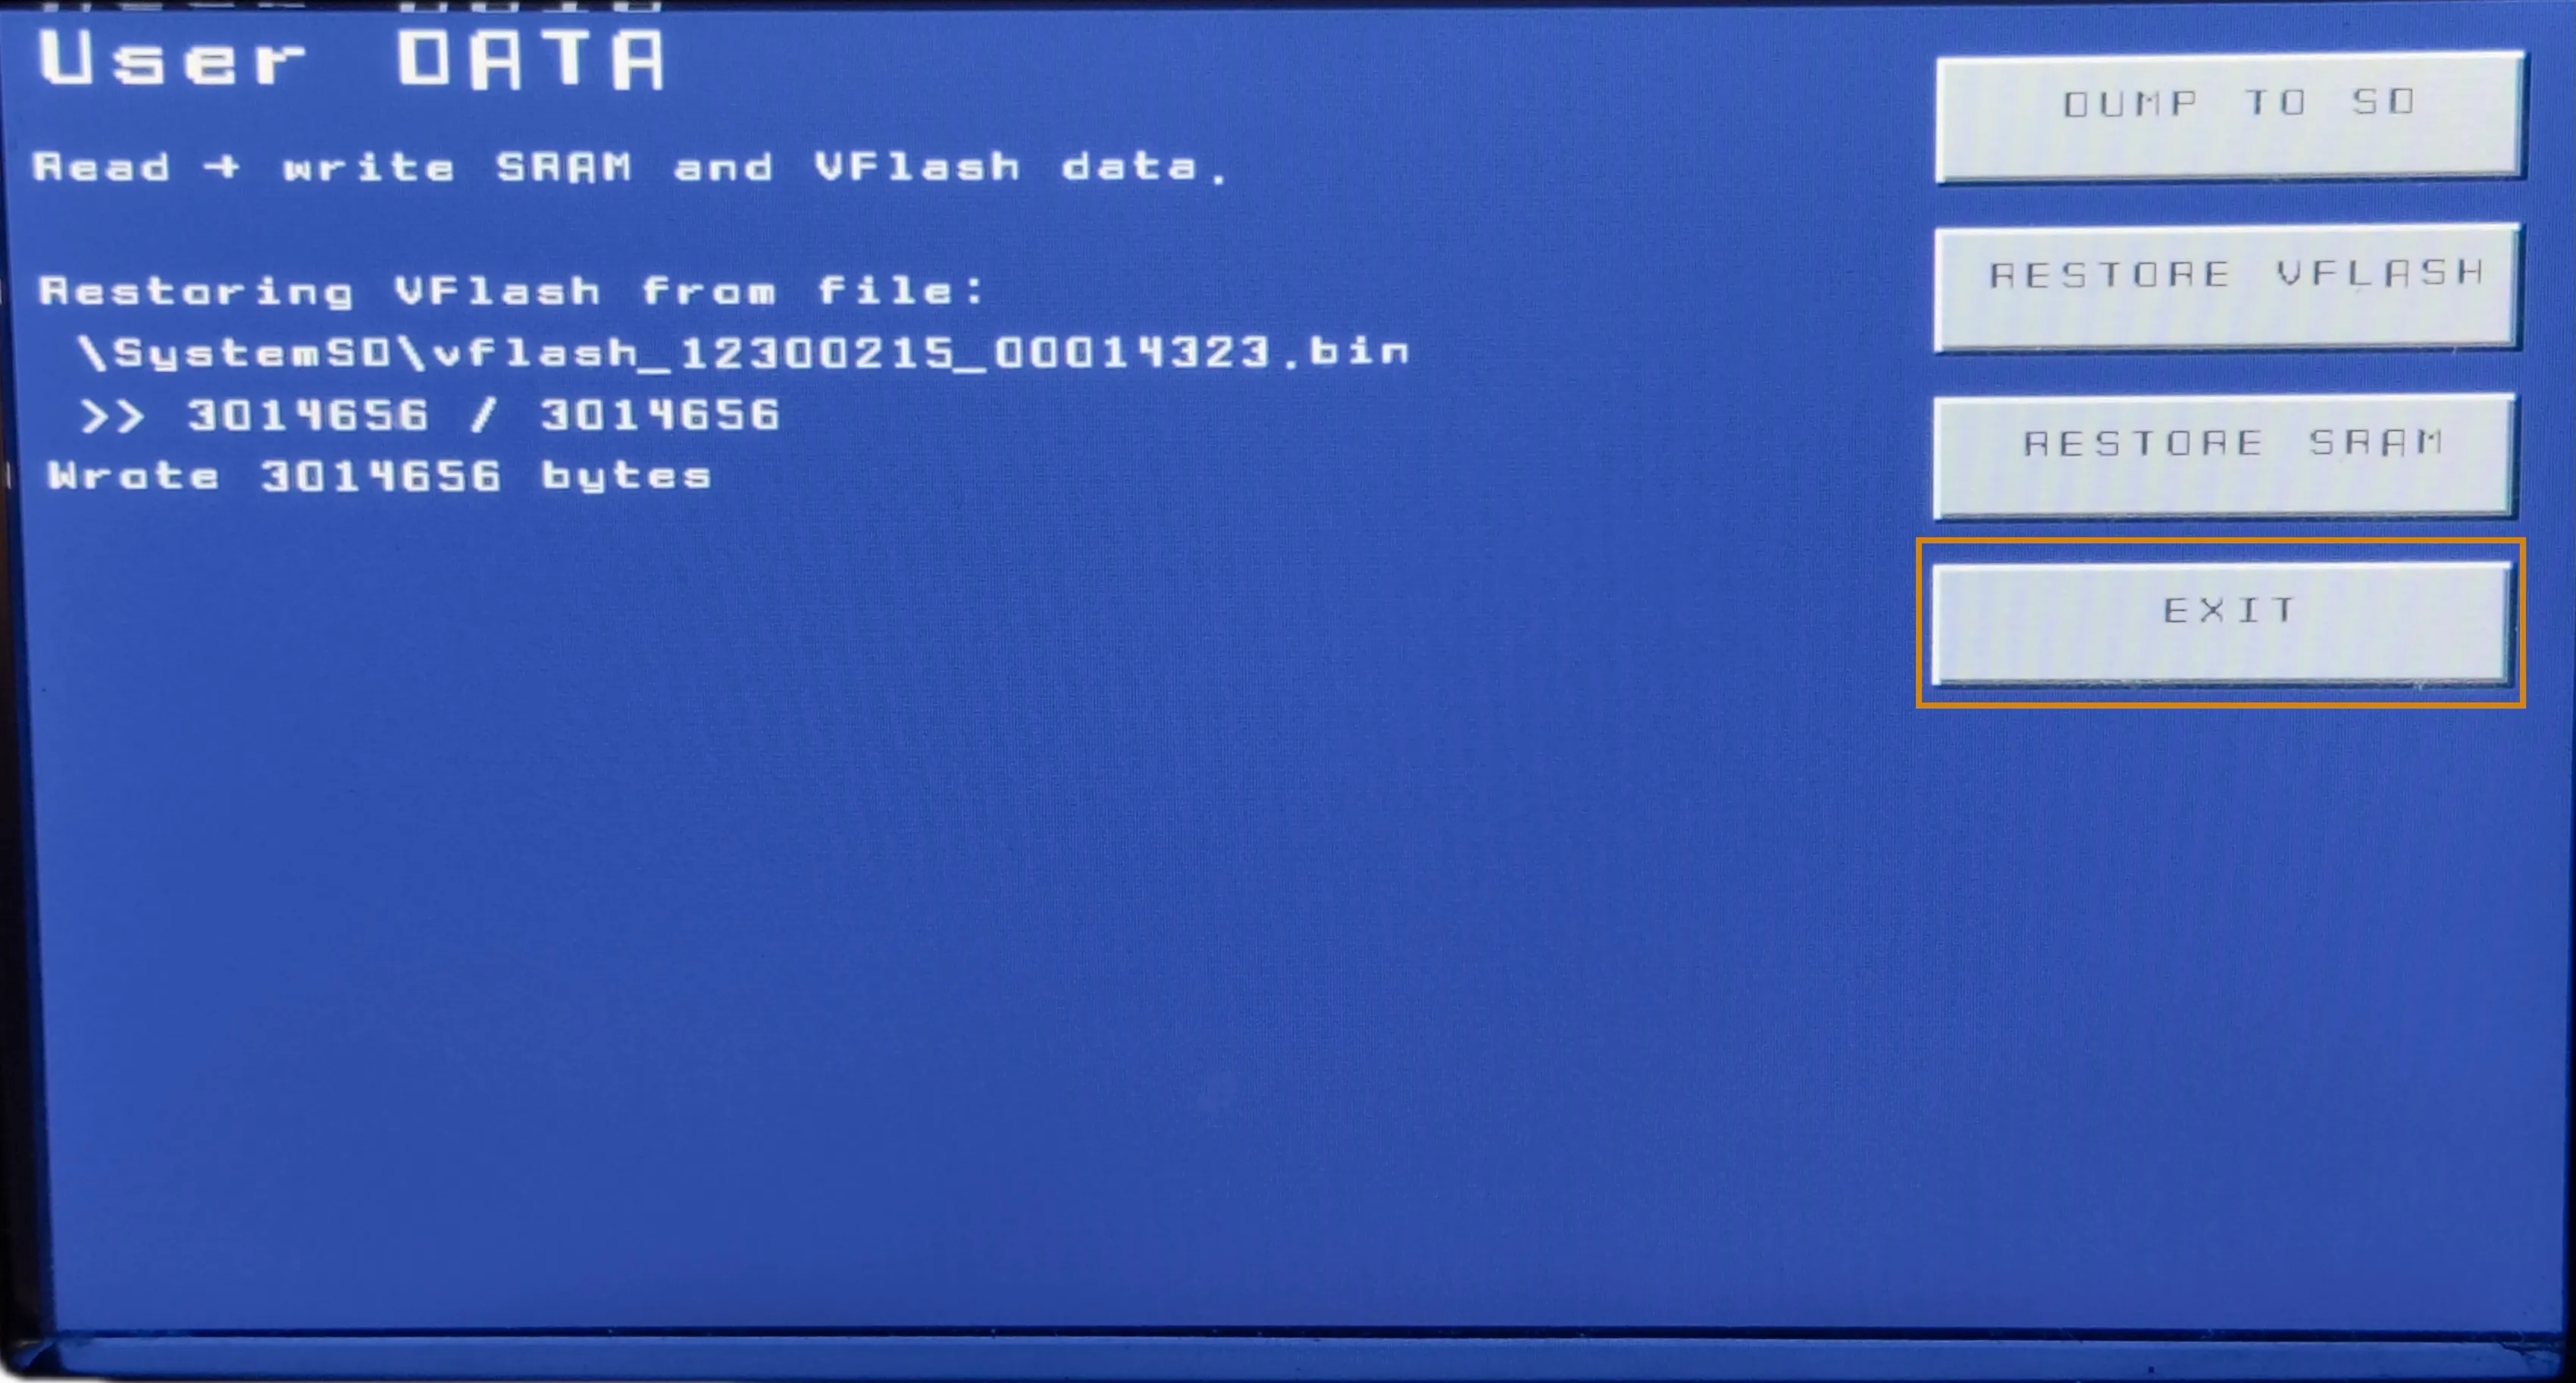
-
Tilt the screen and remove the LeafSDTools SD card from slot B. Put the navigation unit’s original SD card back into slot B and turn on the car. You will see this message. Press Yes to exit the software update menu.
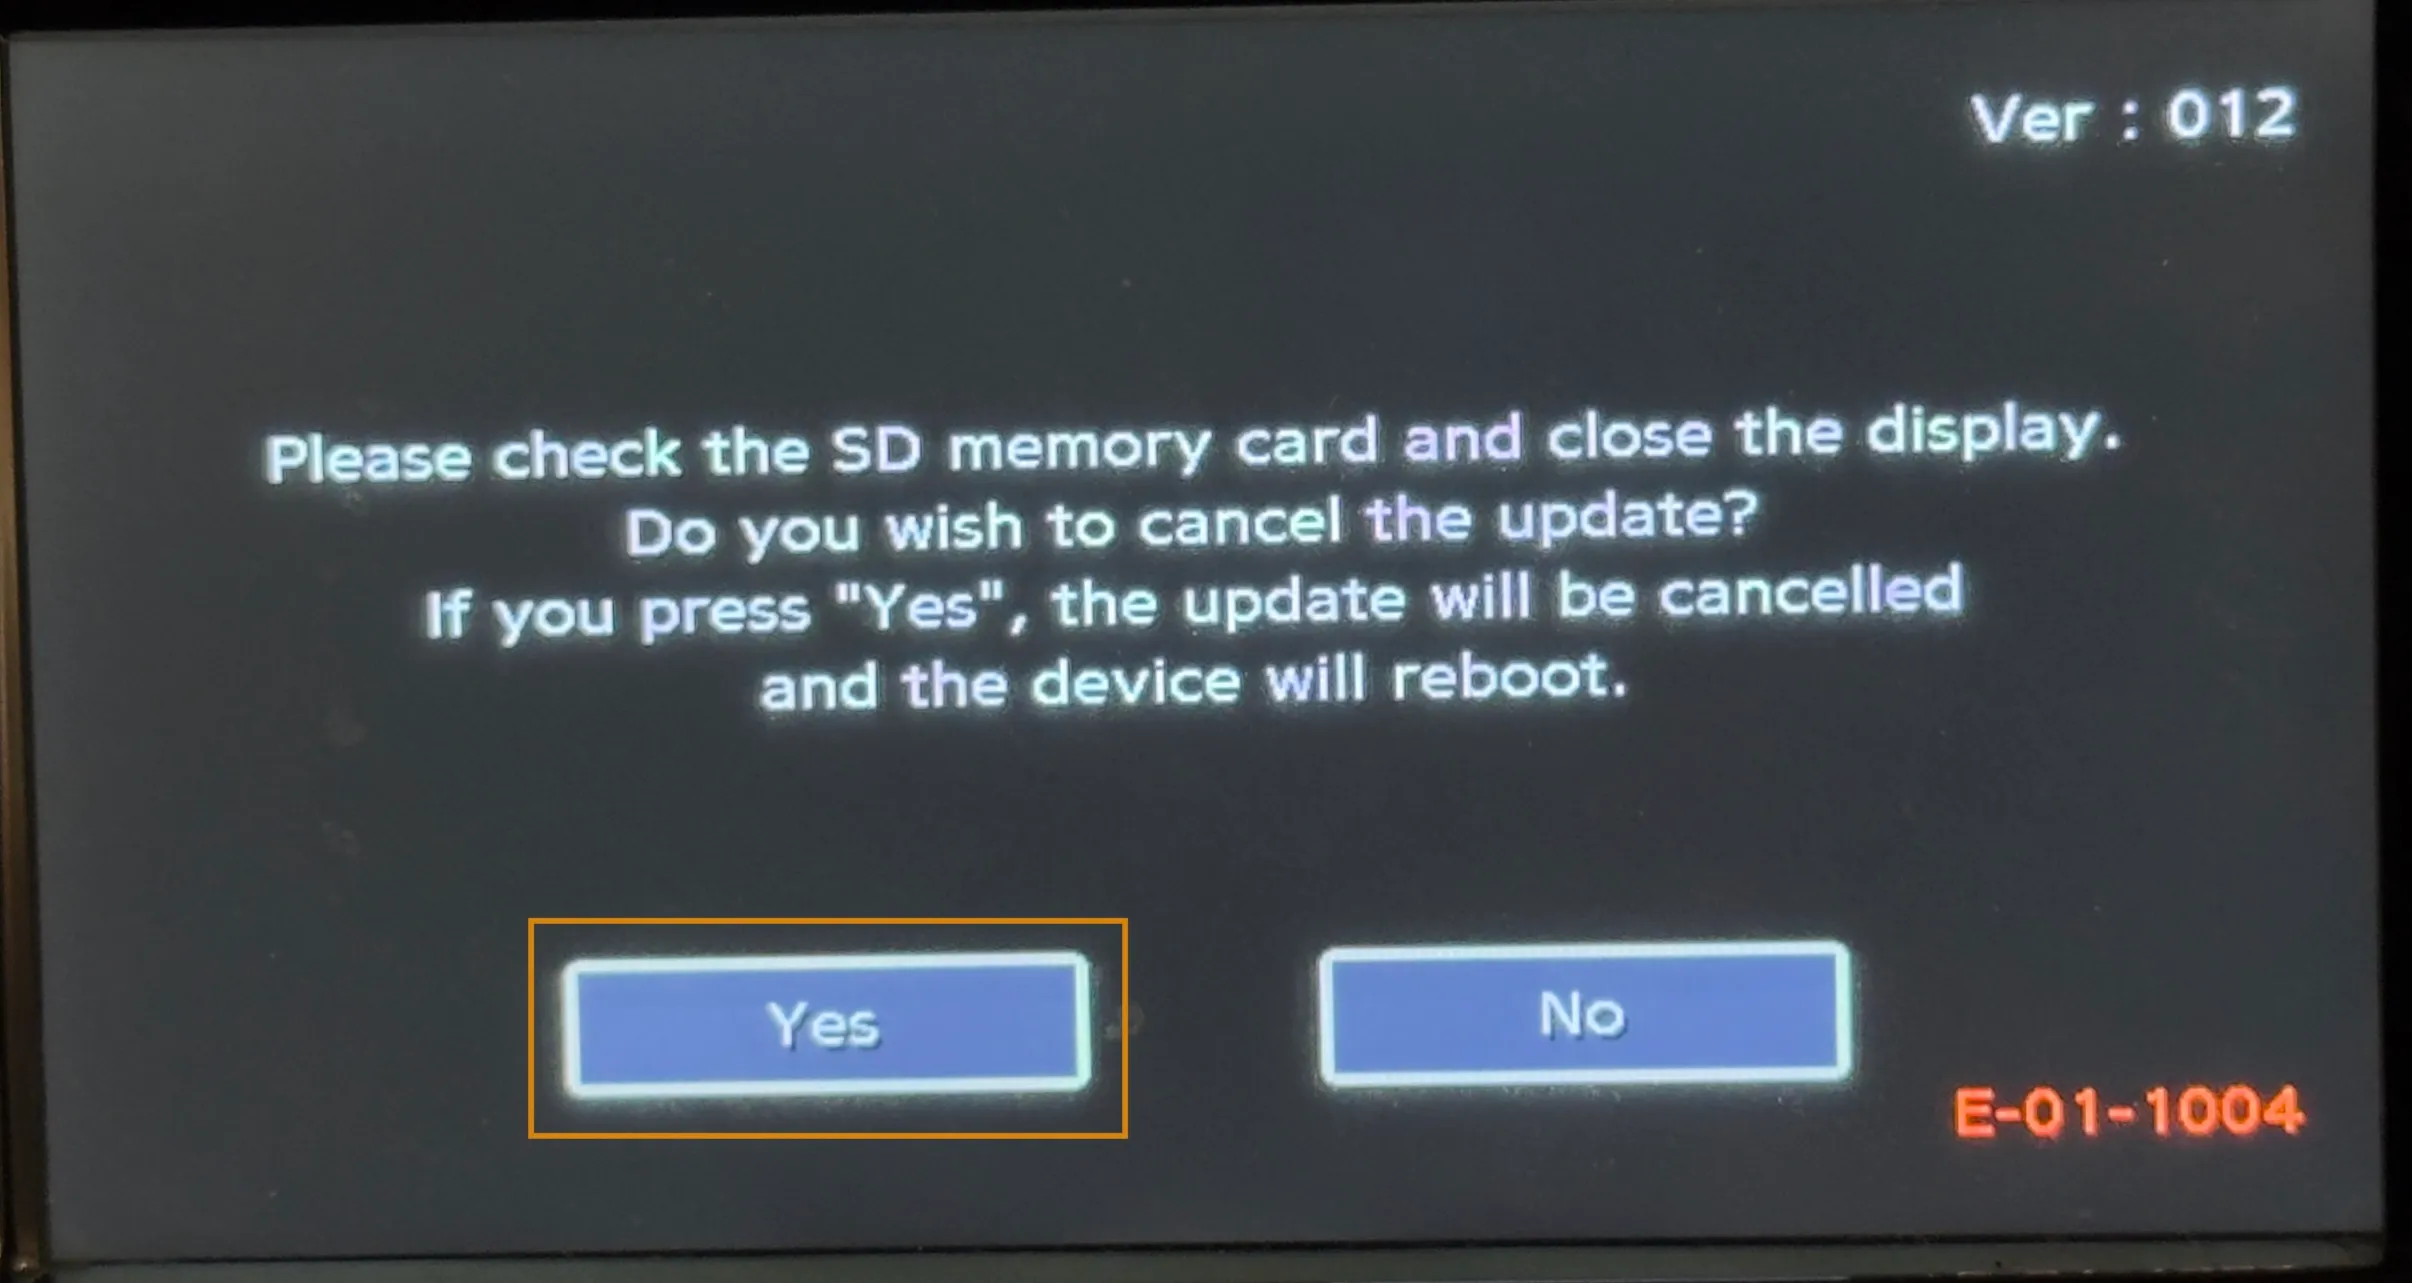
-
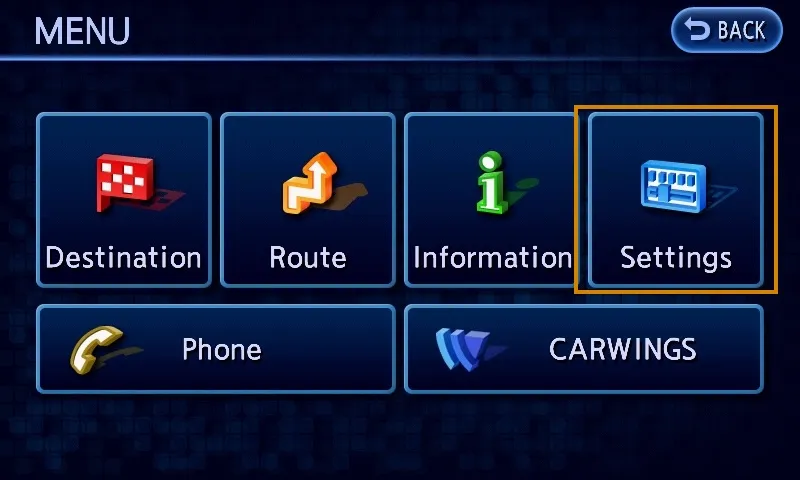
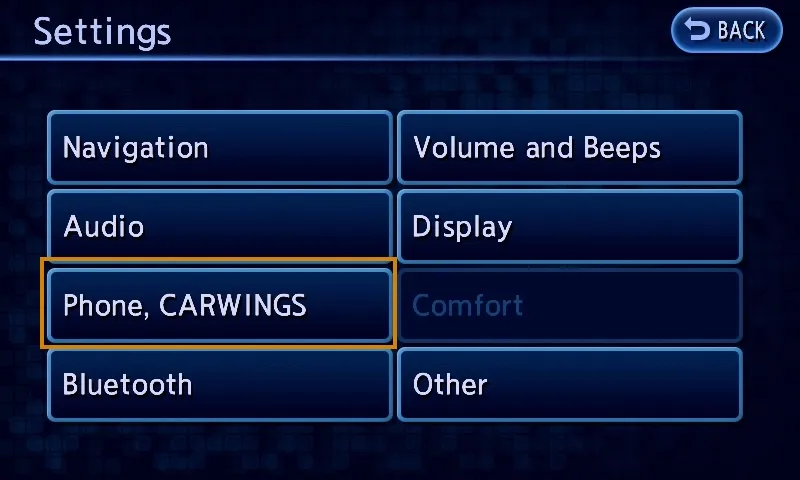
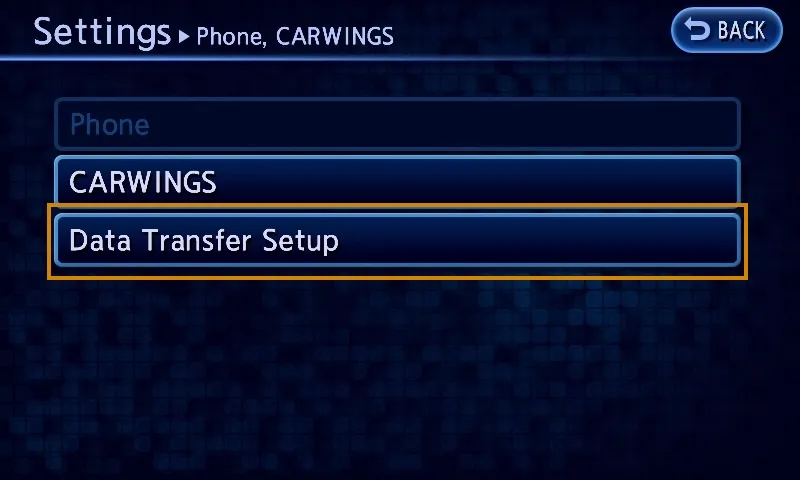
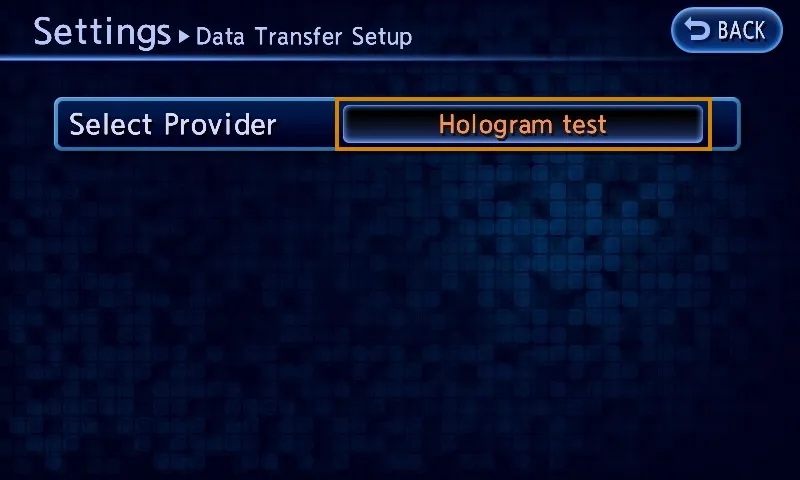
Once the navigation unit has booted back into its OS, check that the new connection settings were applied. Press the physical MENU button on the right side, then select SETTINGS on the screen. Inside settings, select Phone, CARWINGS, then Data Transfer Setup. Your connection profile should be shown if the settings were applied successfully.
Step 5: Authenticate inside the CARWINGS menu
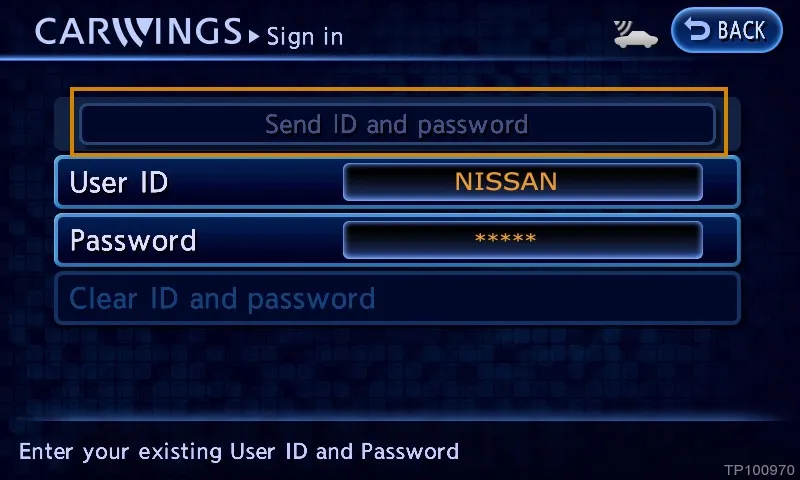
Section titled “Step 5: Authenticate inside the CARWINGS menu”The final step is to authenticate with your username and the TCU password you created in the OpenCARWINGS service.
-
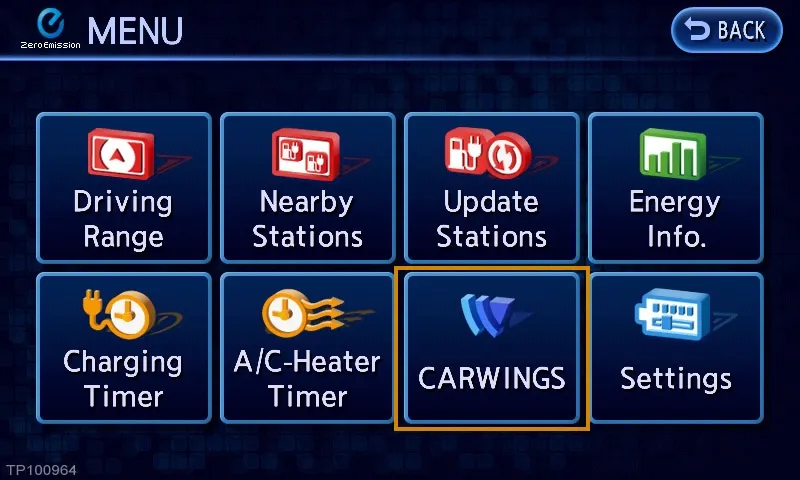
Press the Zero Emission button, then select CARWINGS.
-
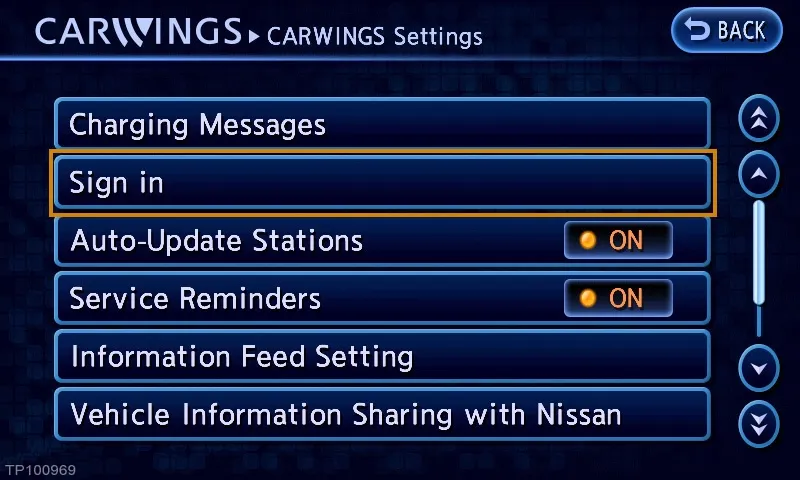
Press Sign In or Security Settings.
-
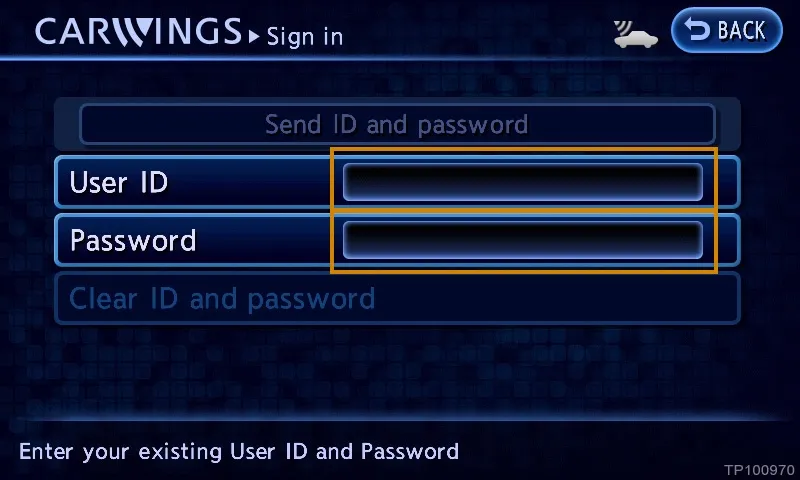
Enter your username and TCU password.
-
Press Send security settings or Send ID and password. When the message “Security settings activated” appears, the login was successful and CARWINGS services are ready to use.